Progress

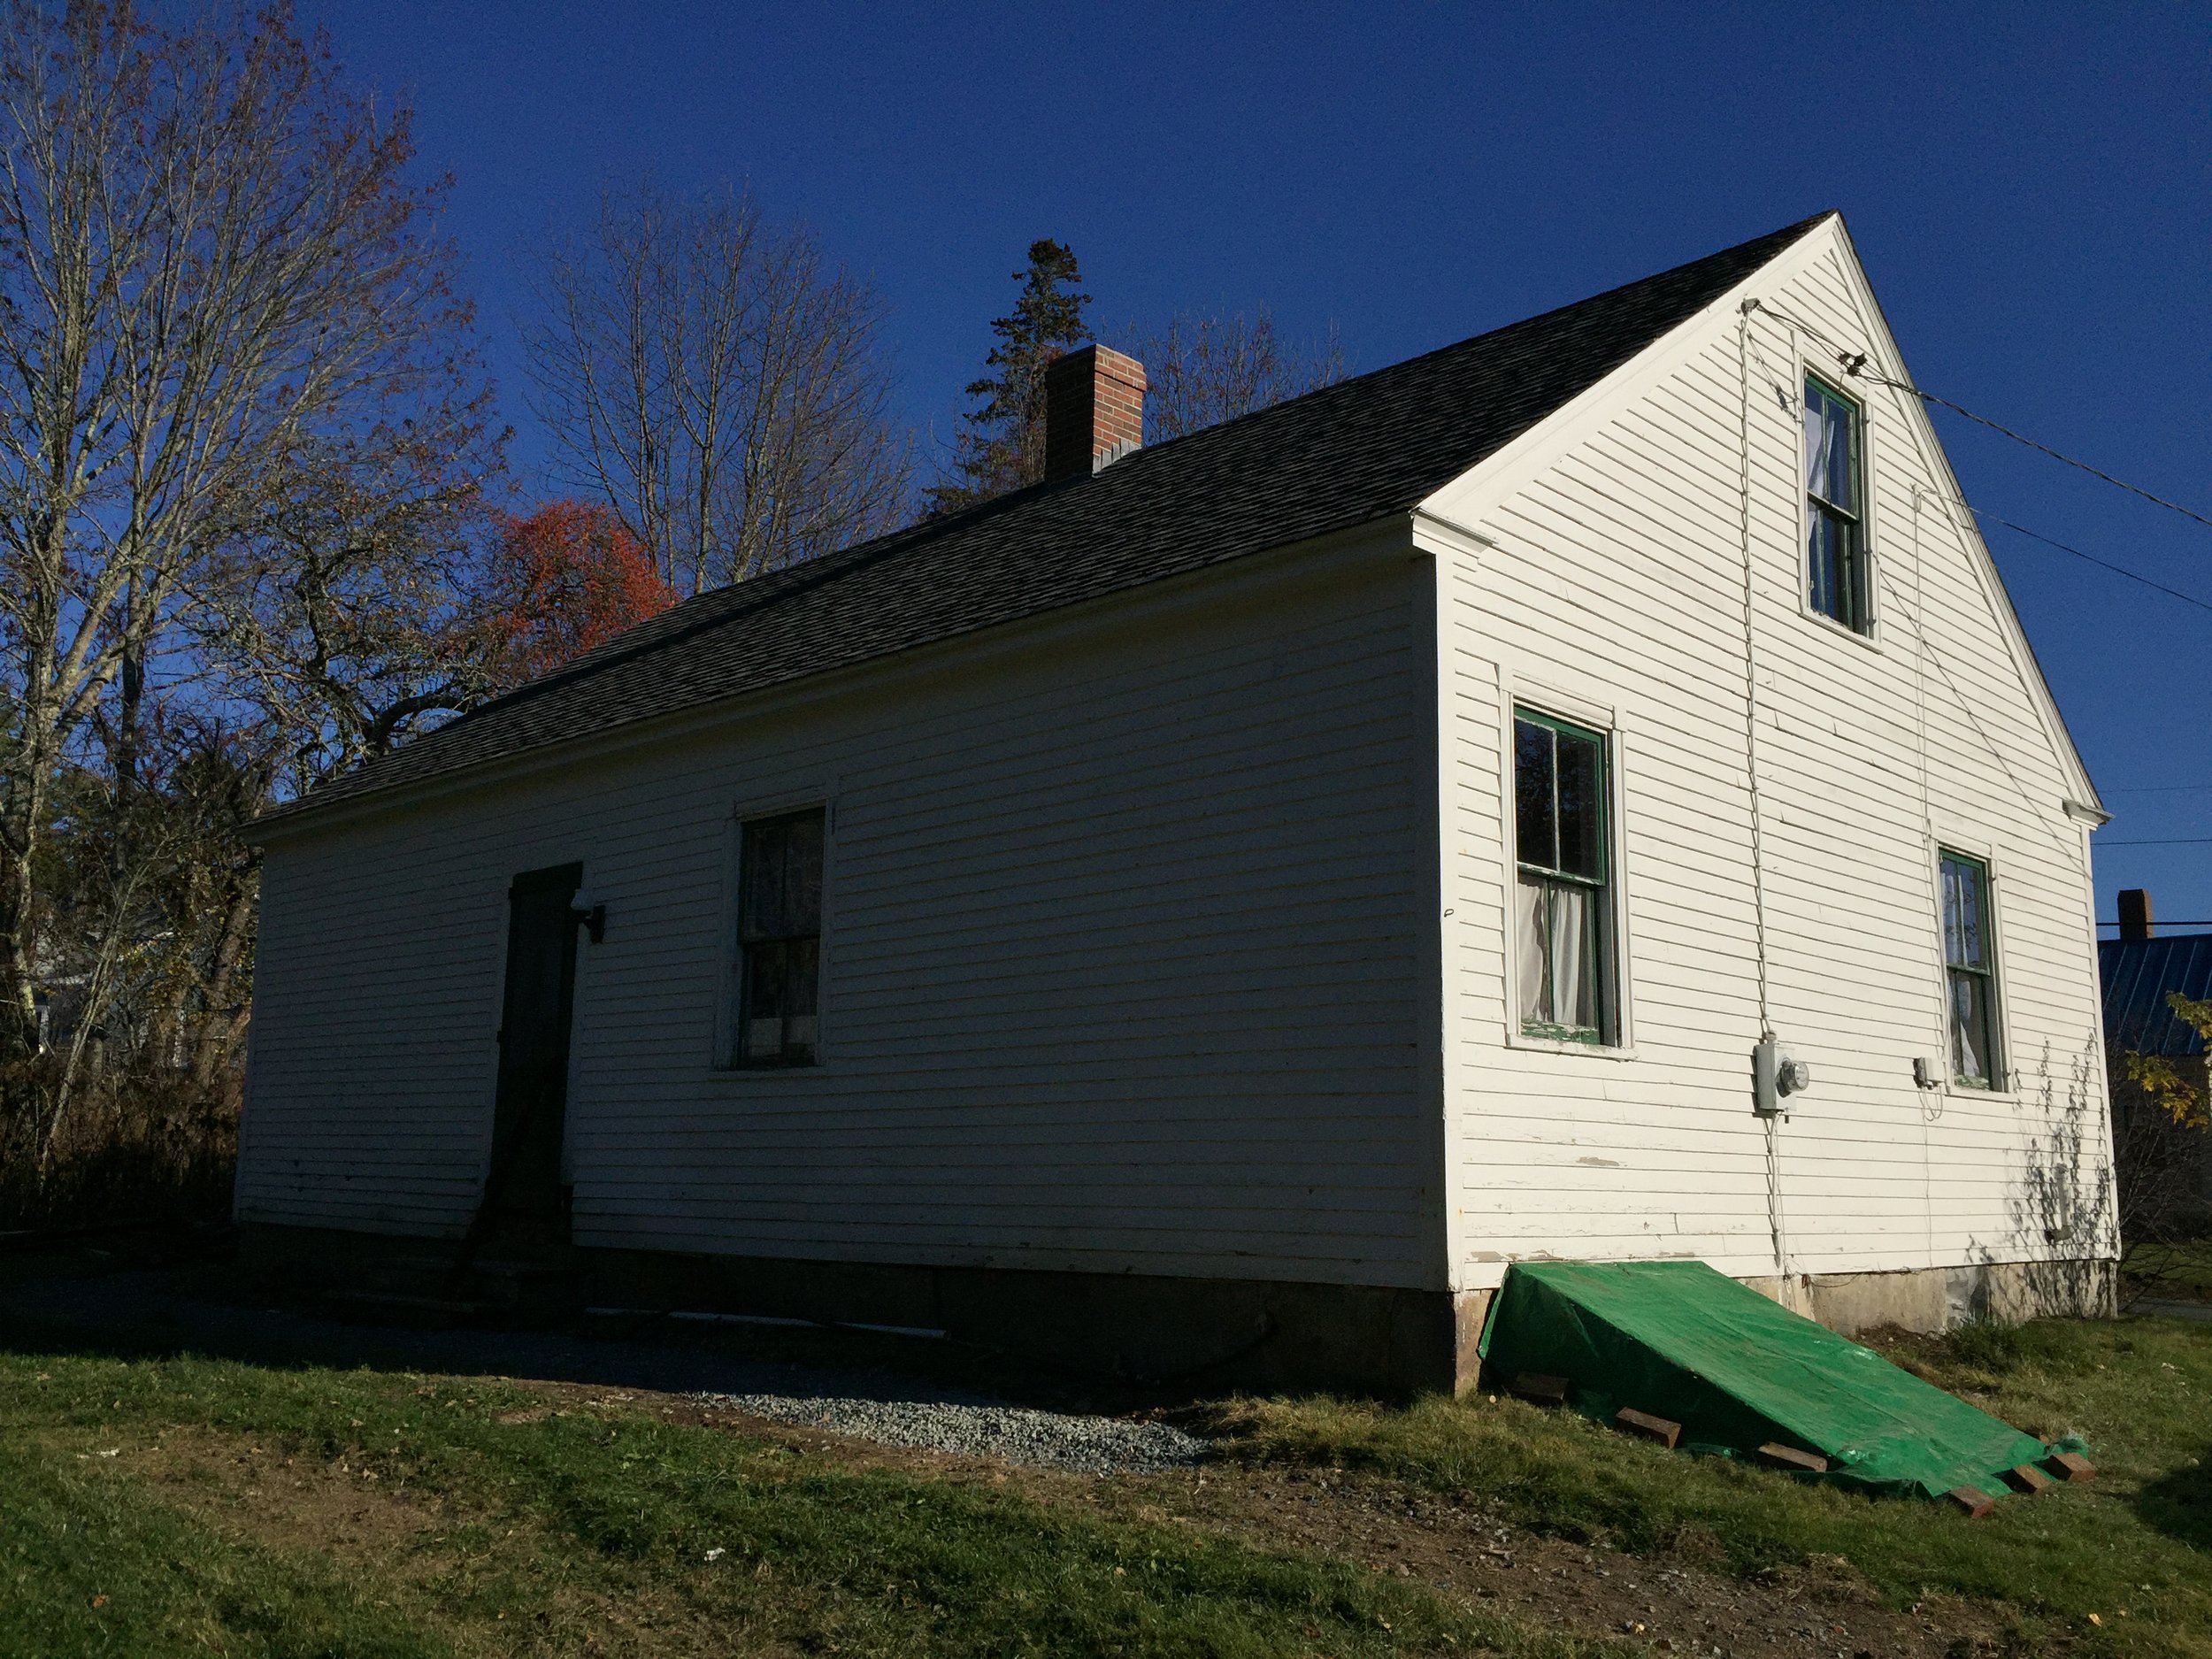
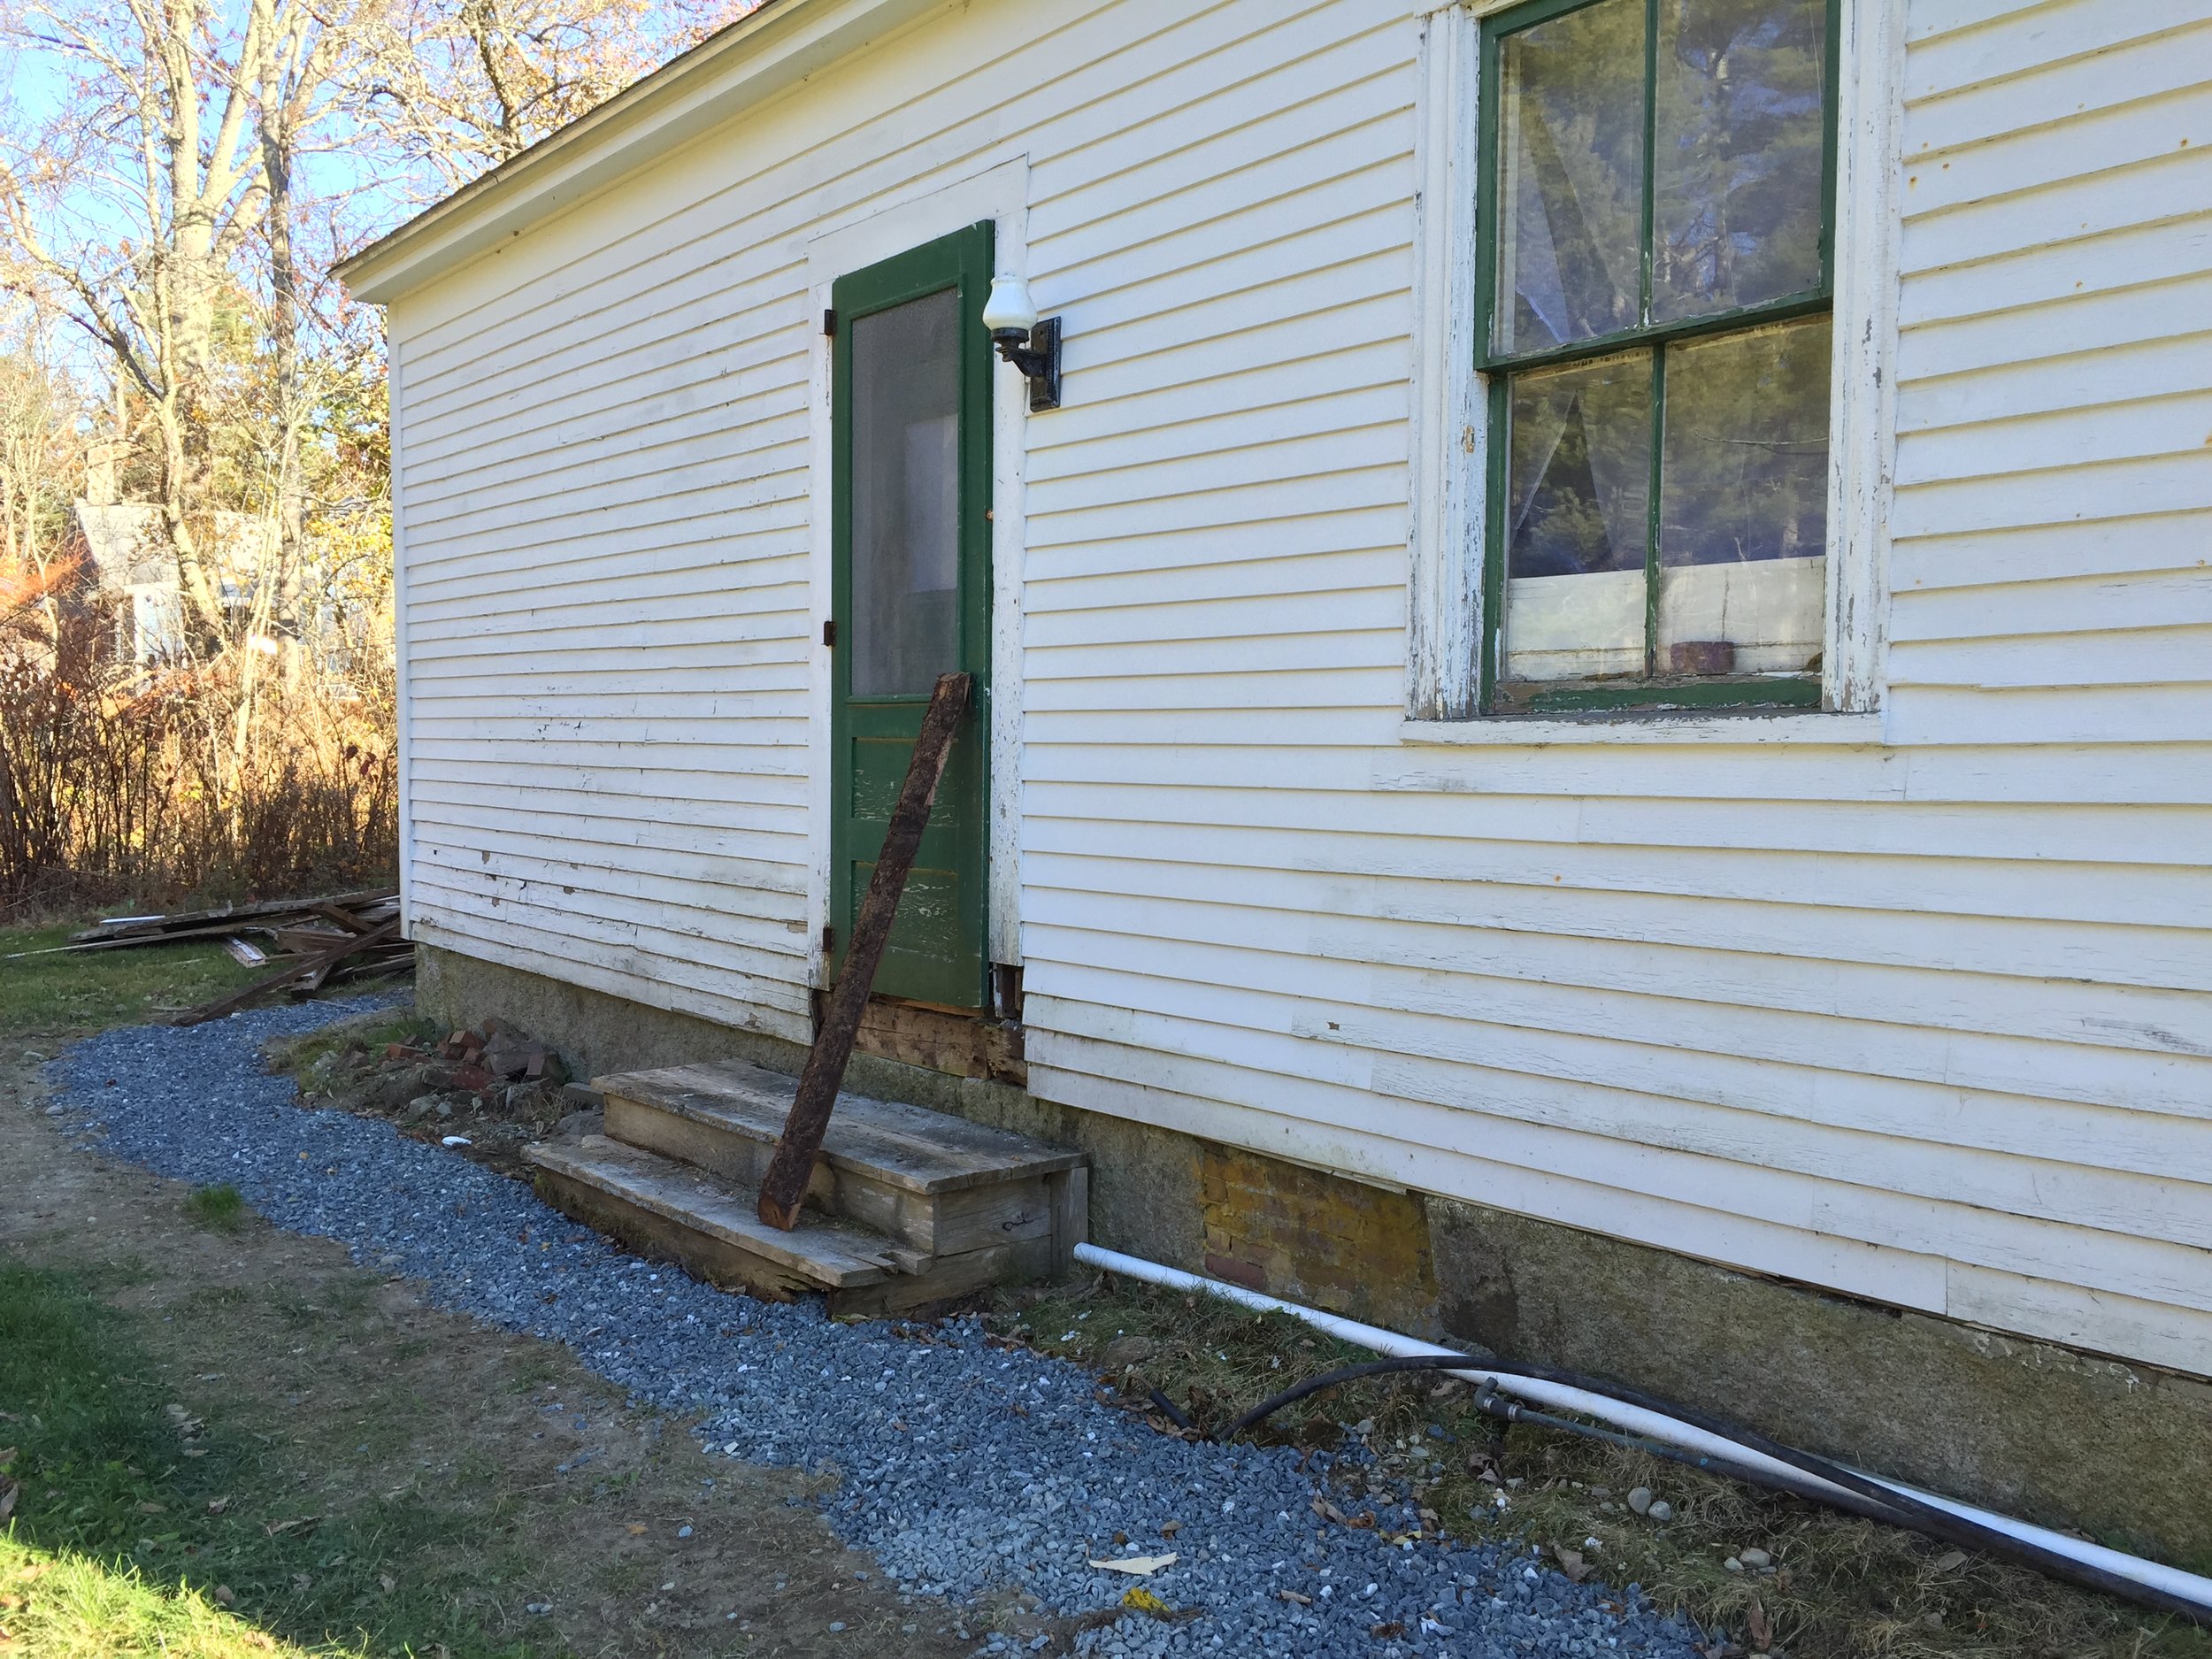
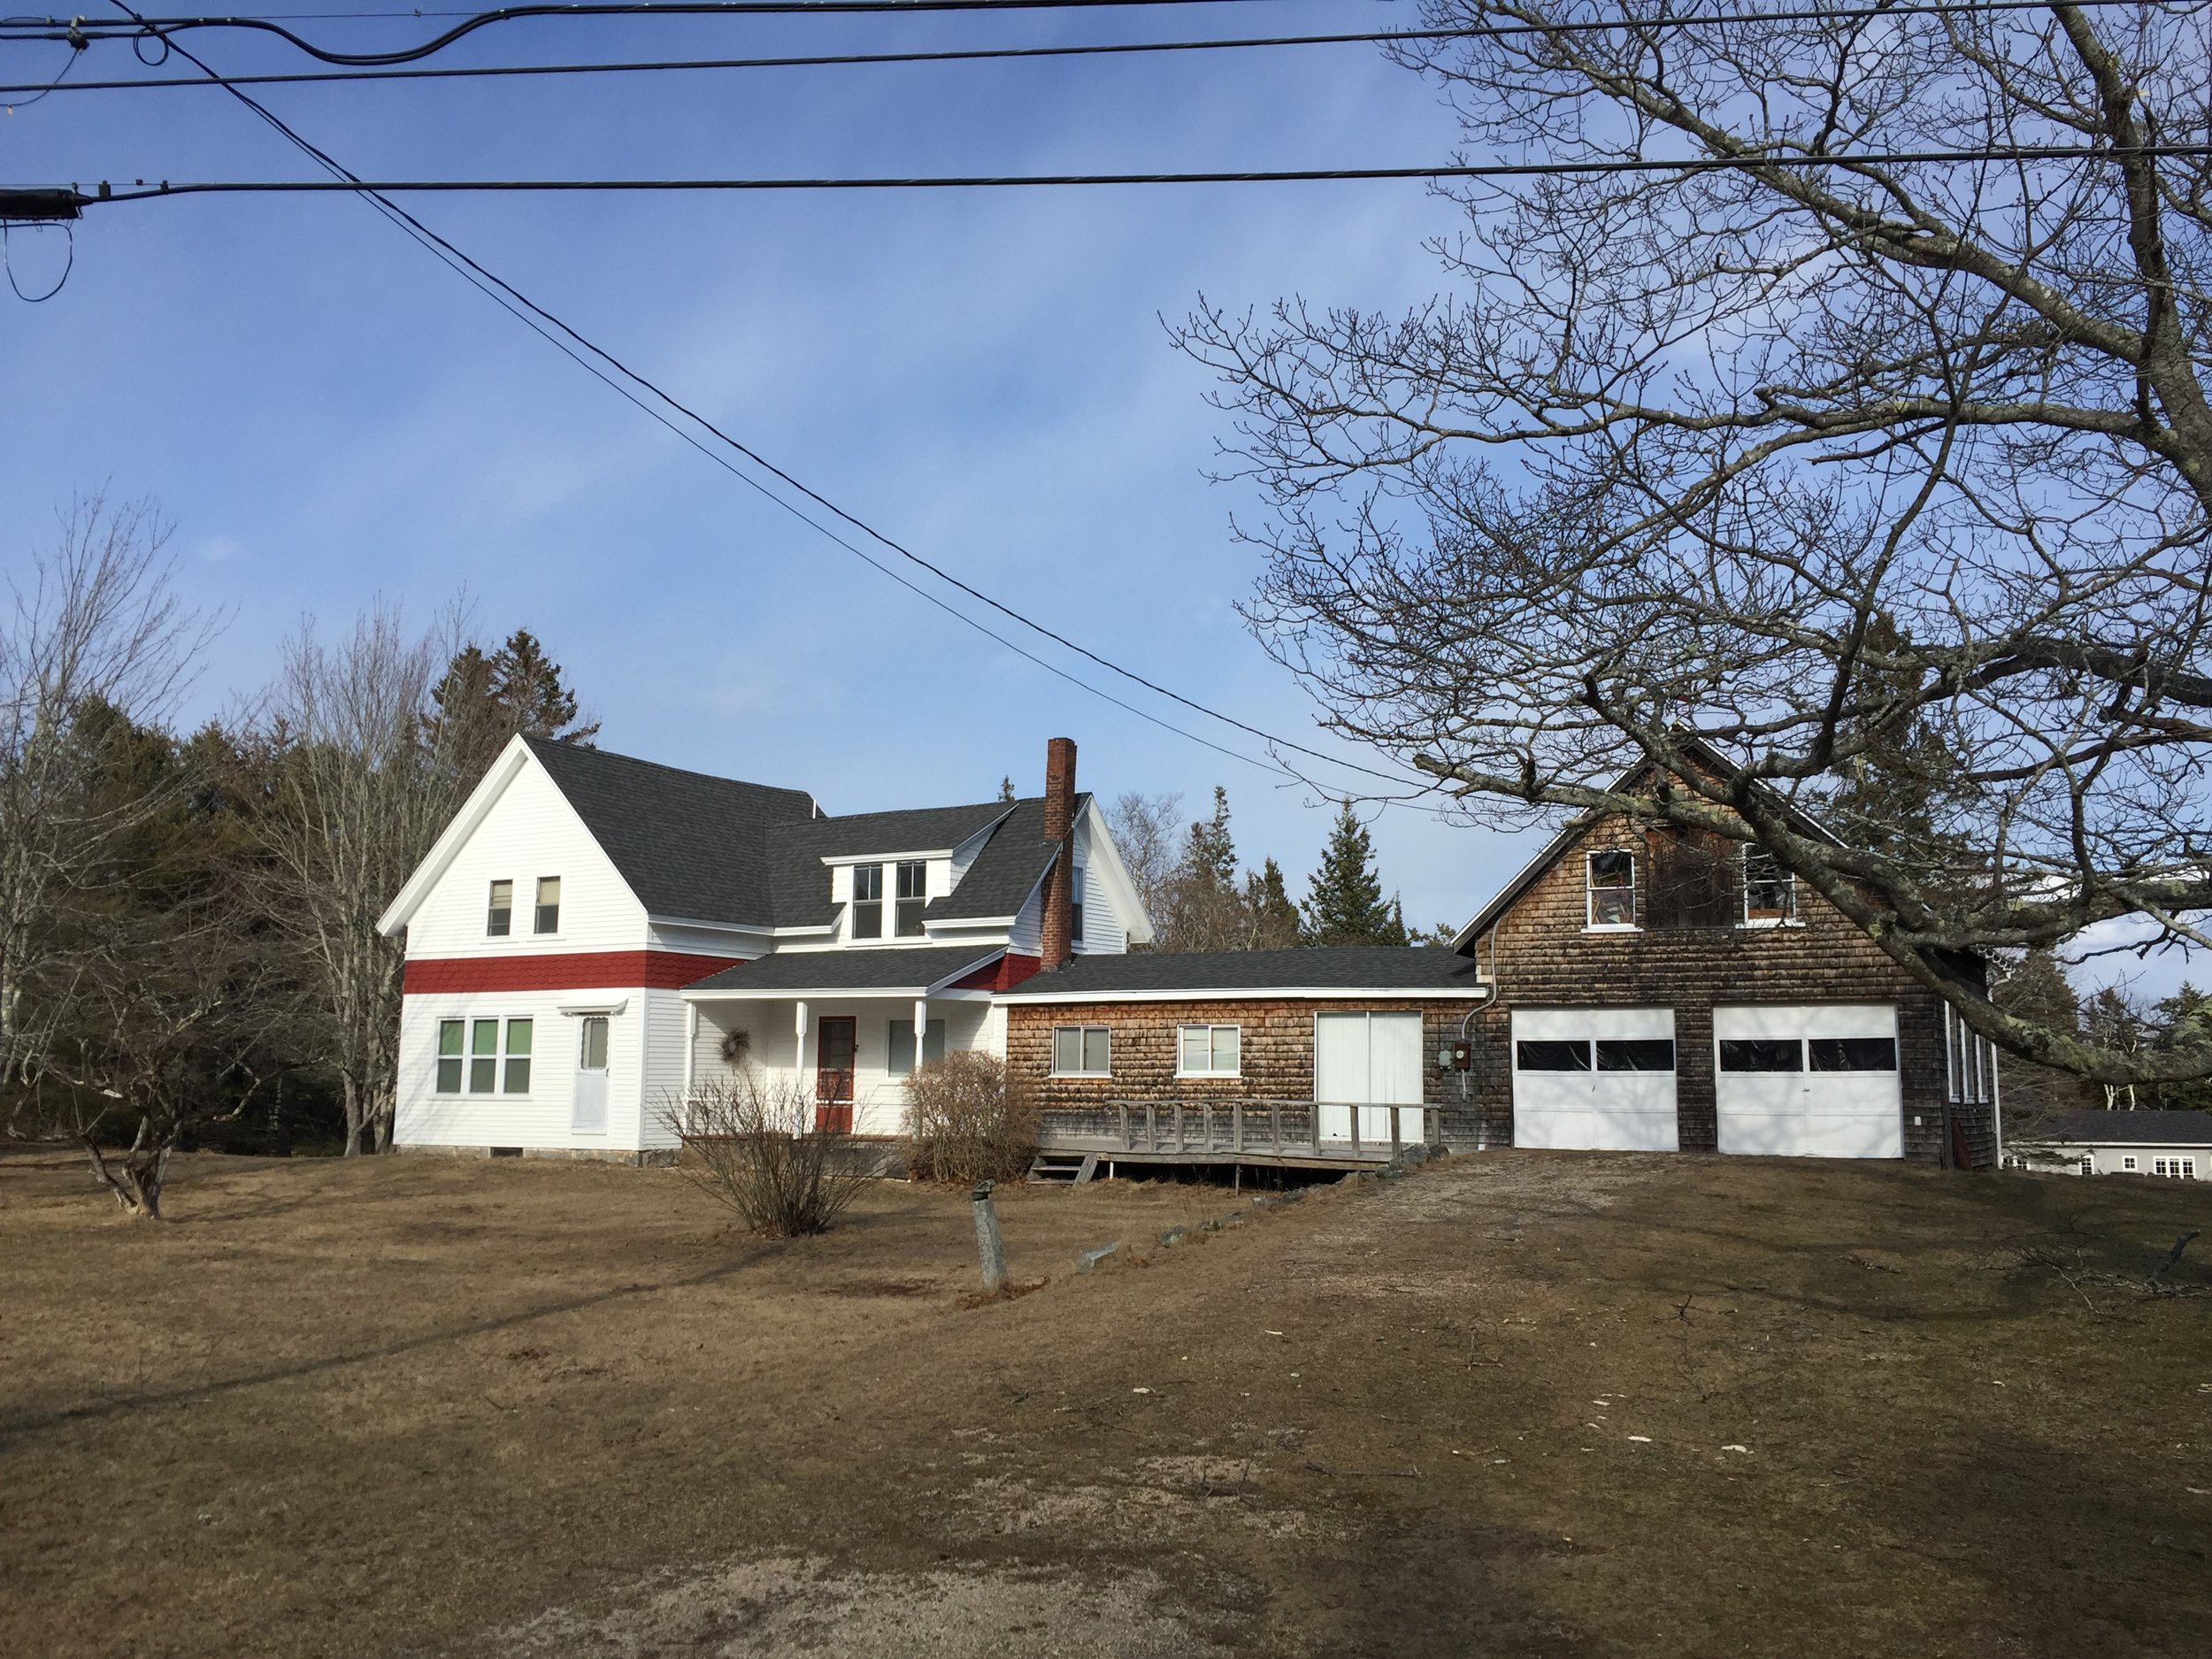
It's finally Maine house season! Last month, my Dad drove up from where he lives in Florida to get his house up and running again. Heat & water on, time to party. Our family, on both sides, had the inability to throw anything away, including their houses and we are so lucky for it. This house is where my Dad grew up, on Little Deer Isle. Our house is about ten minutes away across the bridge on the main land. My parents met in high school, which is why both sides of my family have homes so close together. Having access to this house allows us to keep our little home a complete gutted mess because we have somewhere else to shower and lay our heads. And hang out with family, friends, etc. Isn't she cute?

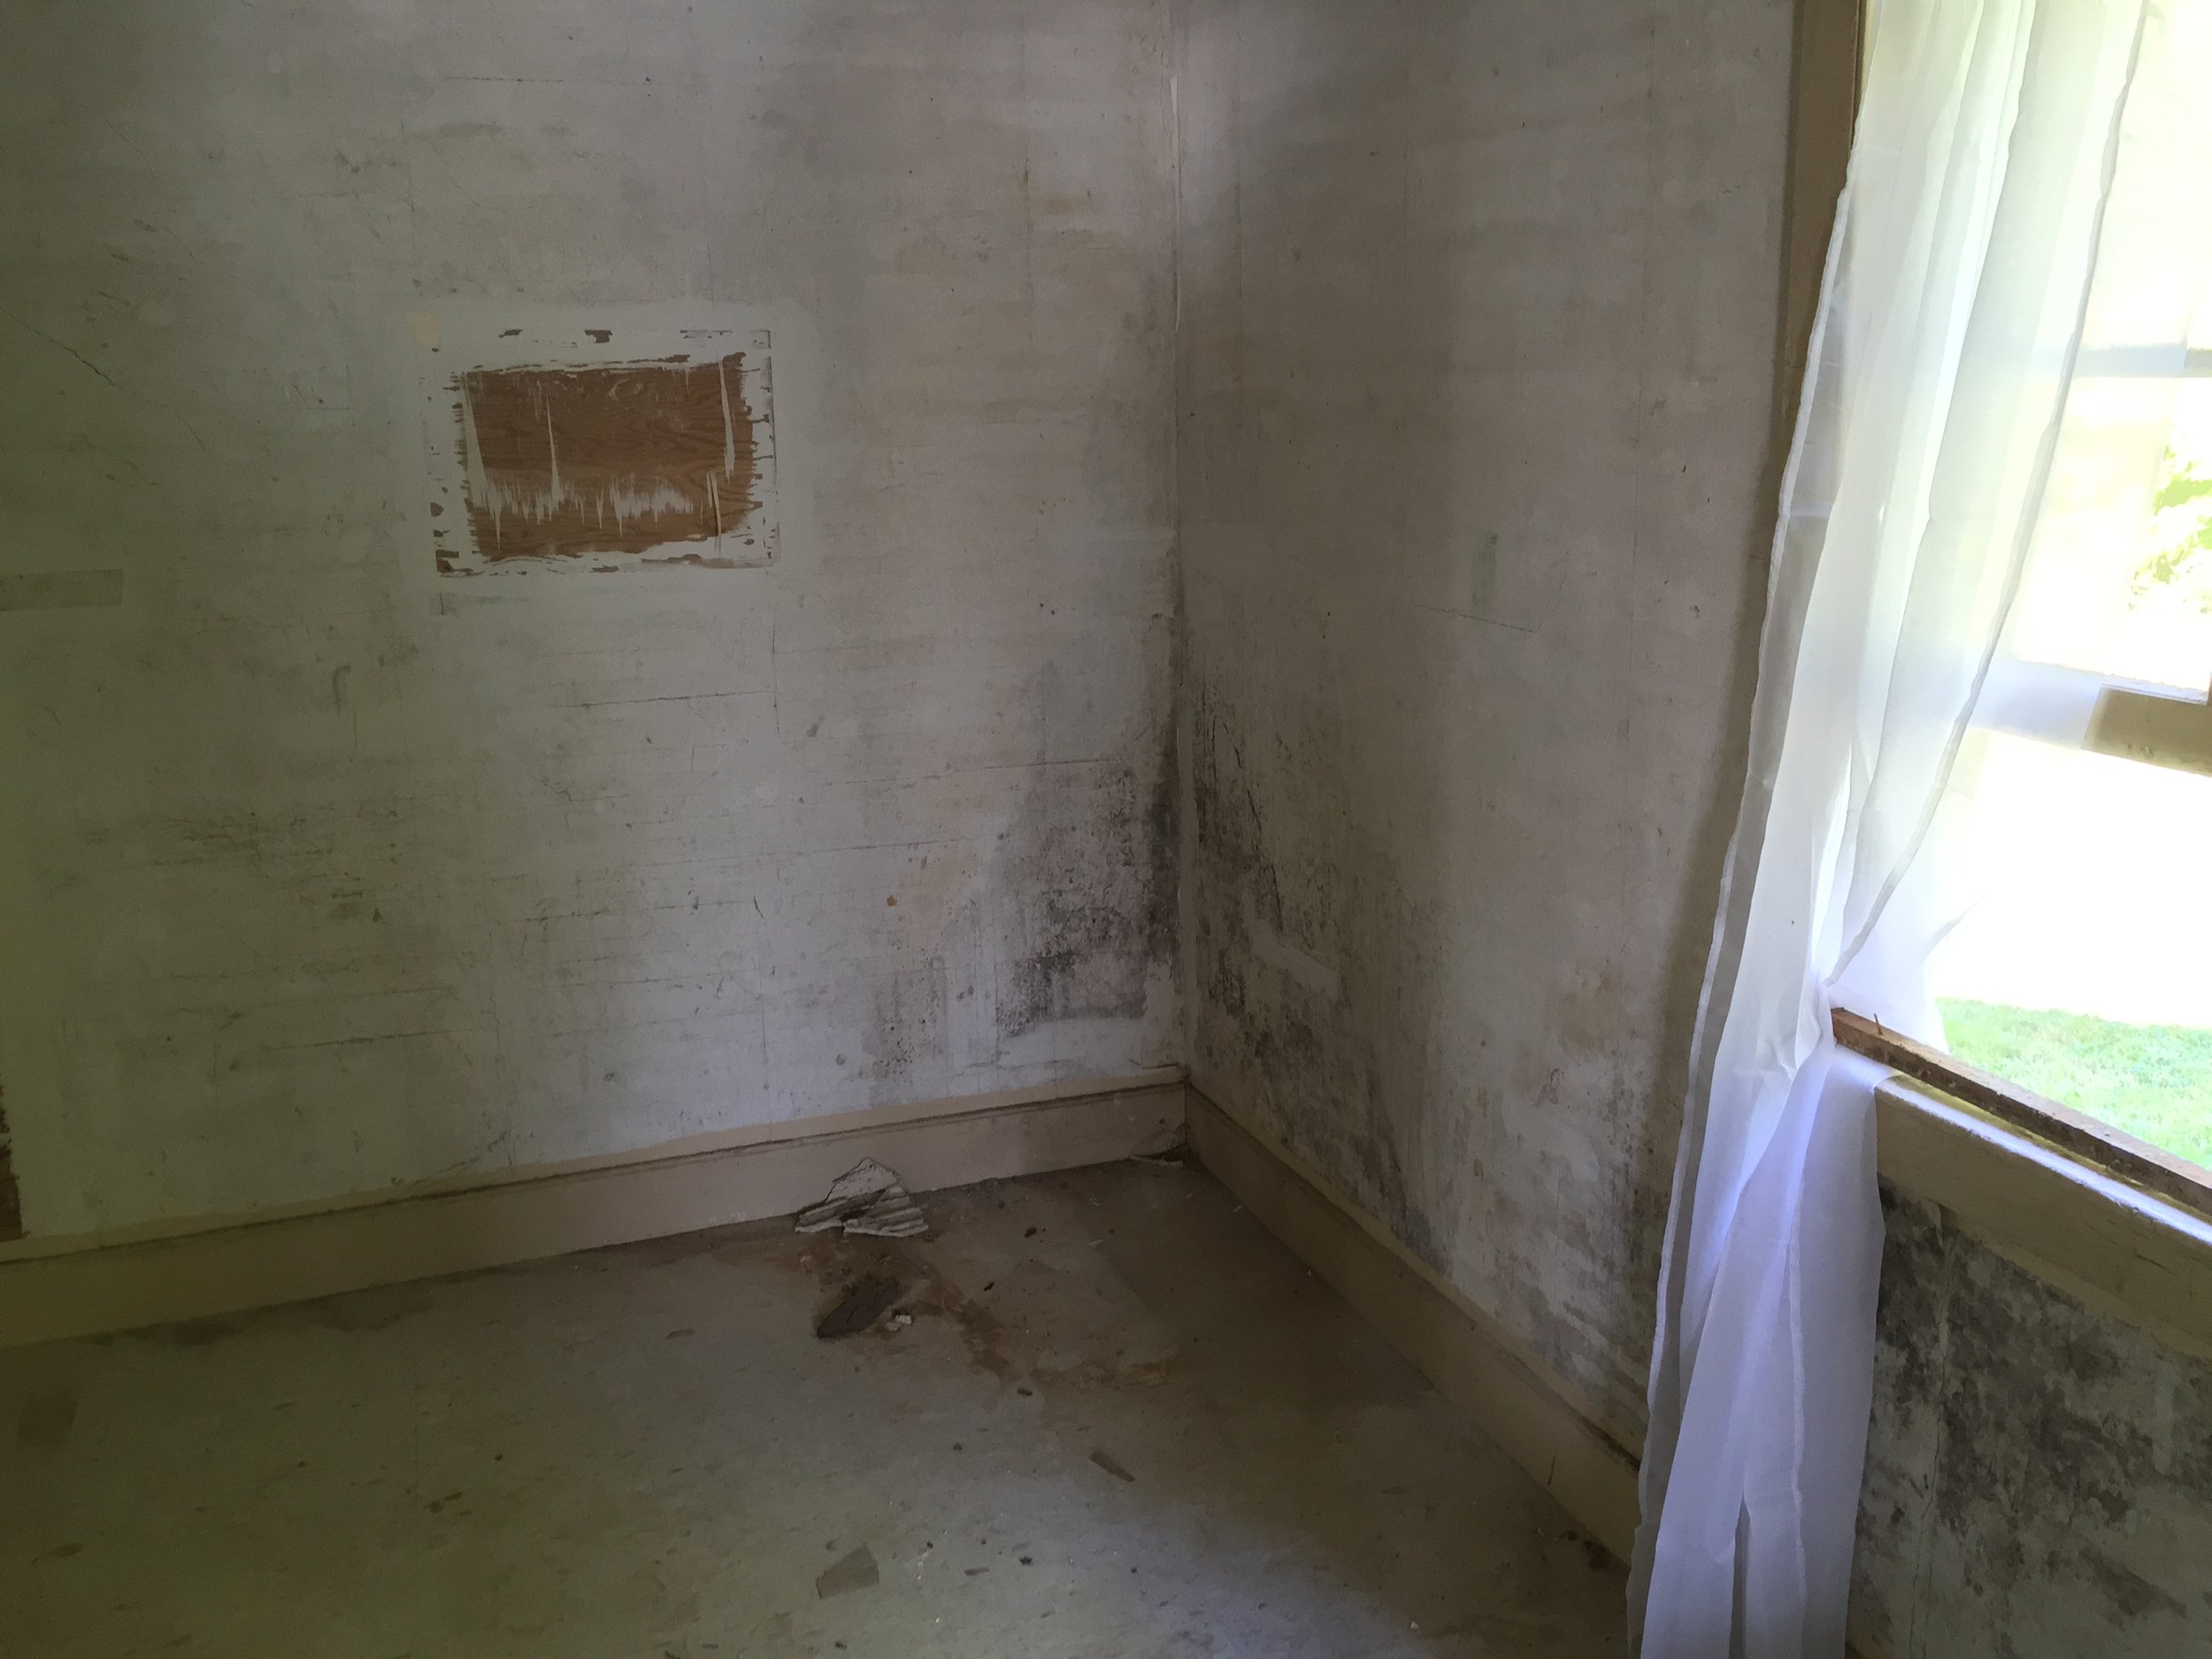
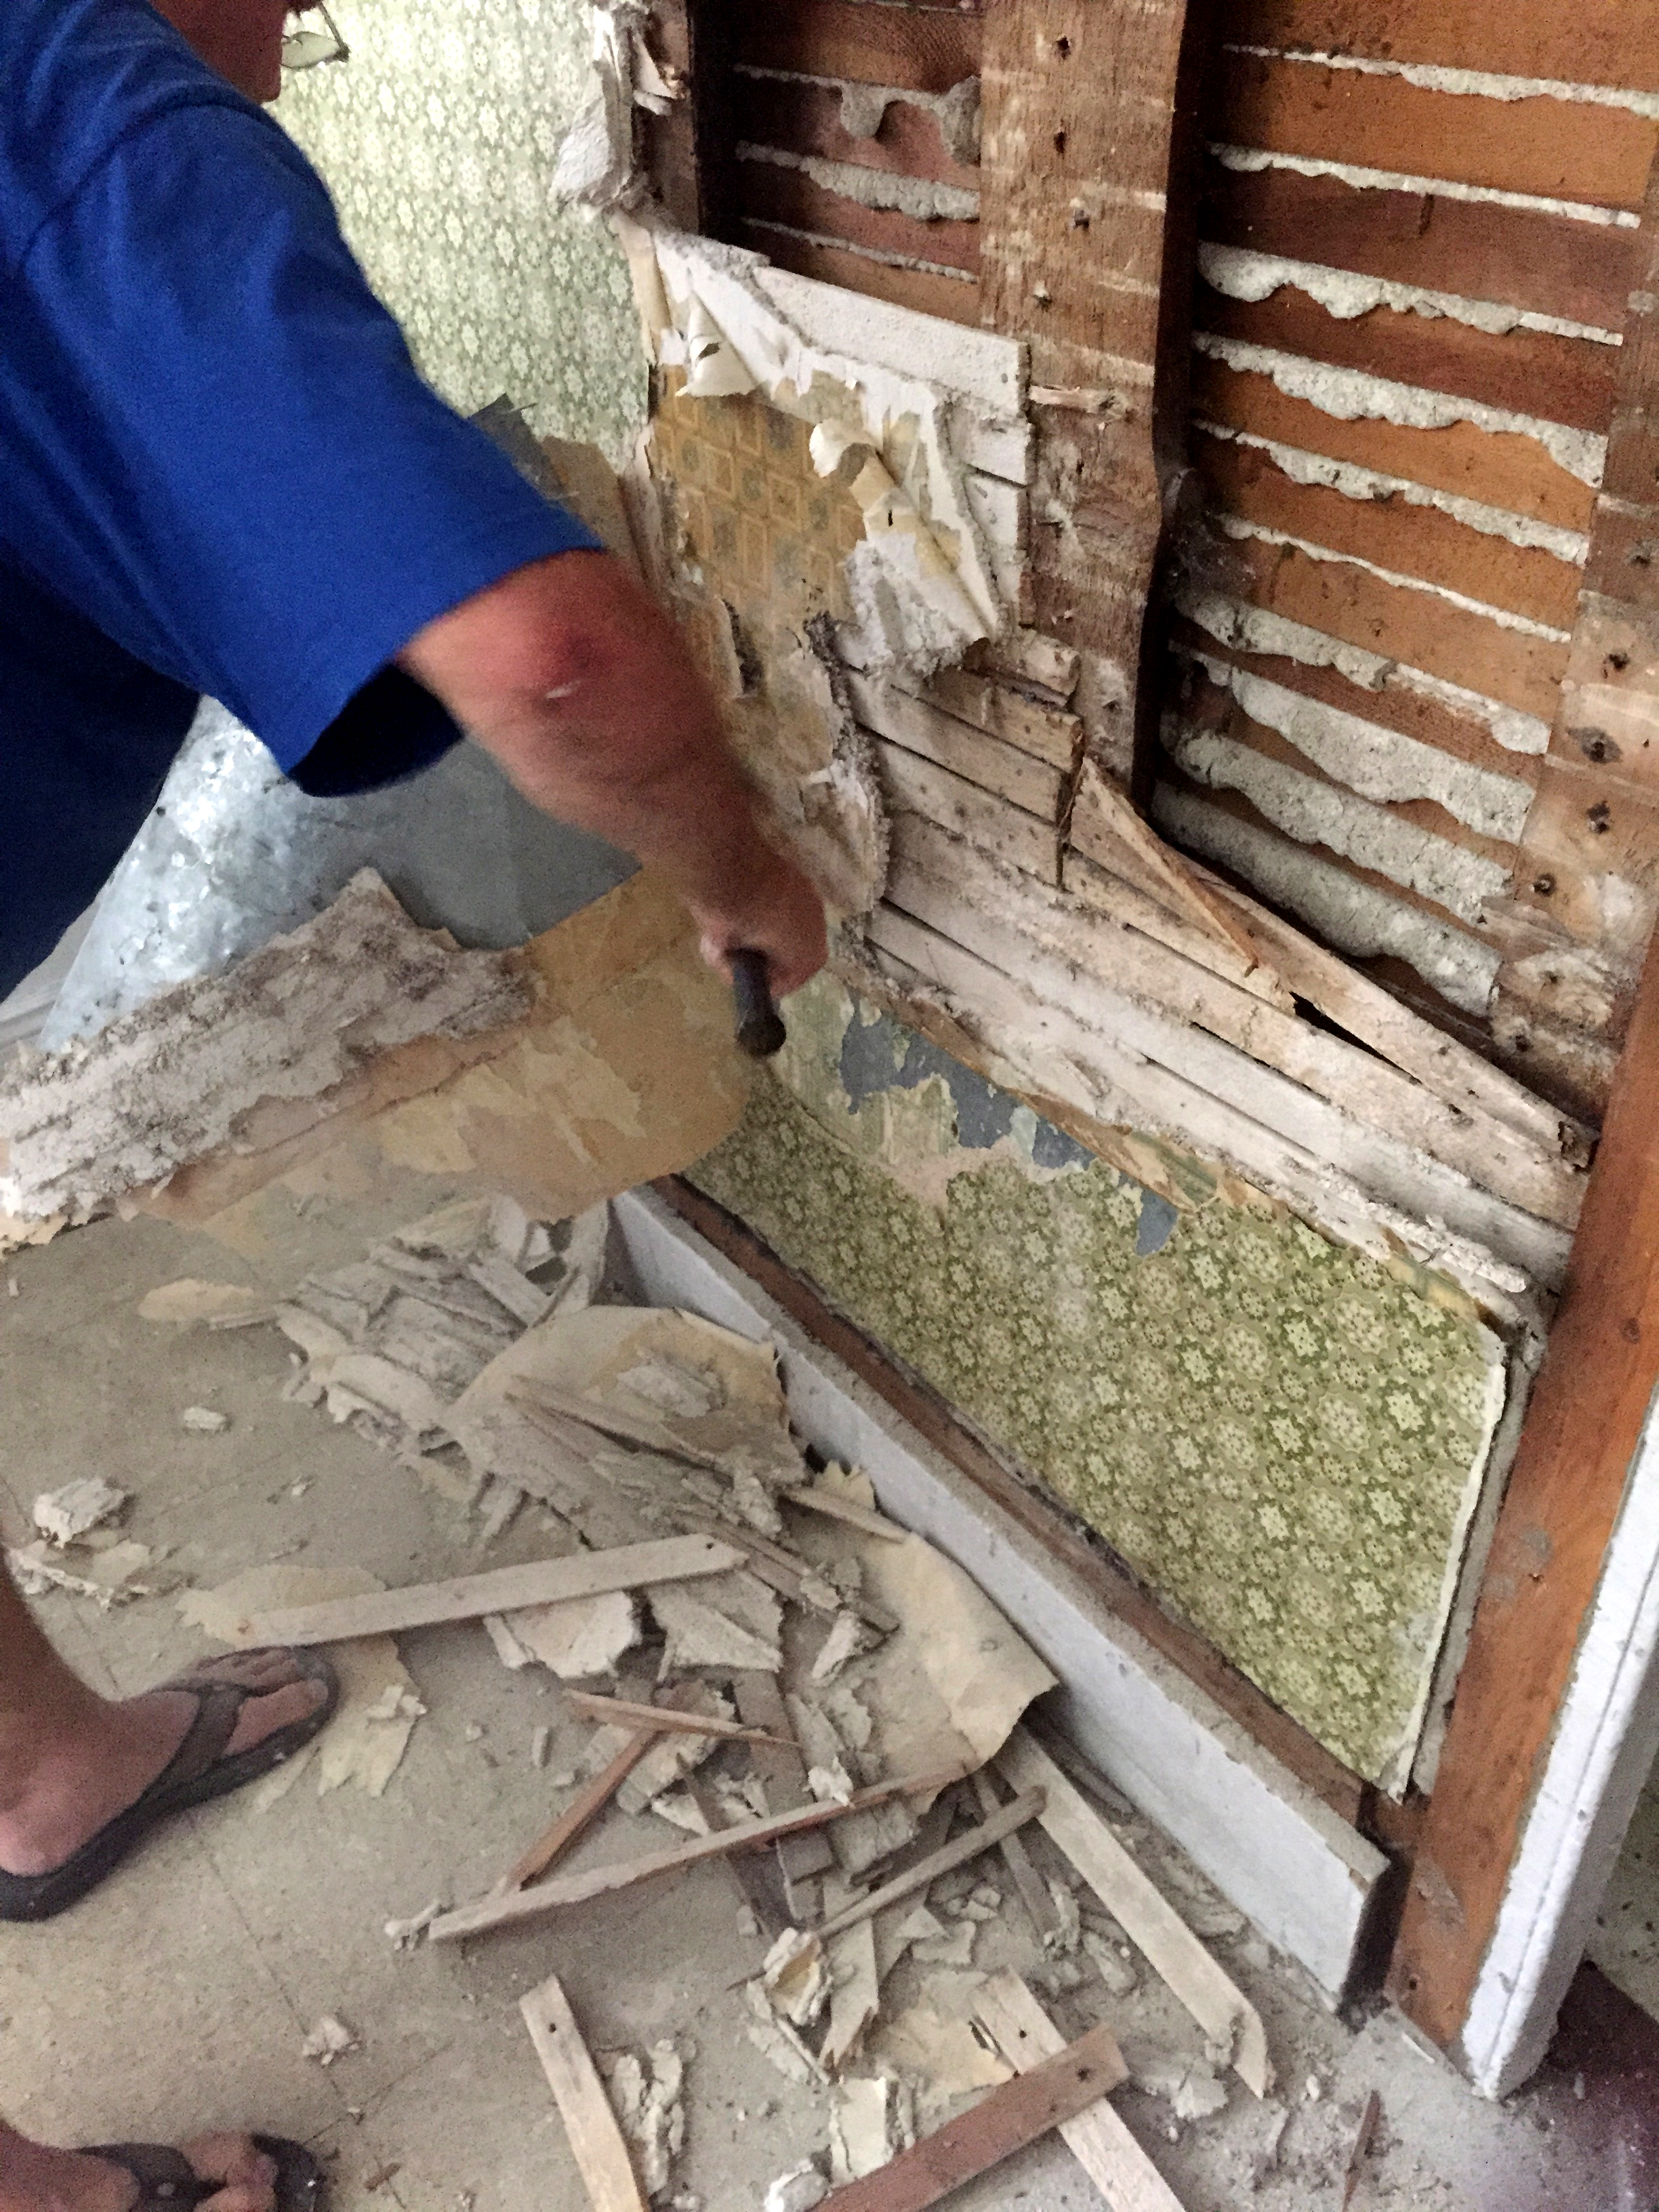
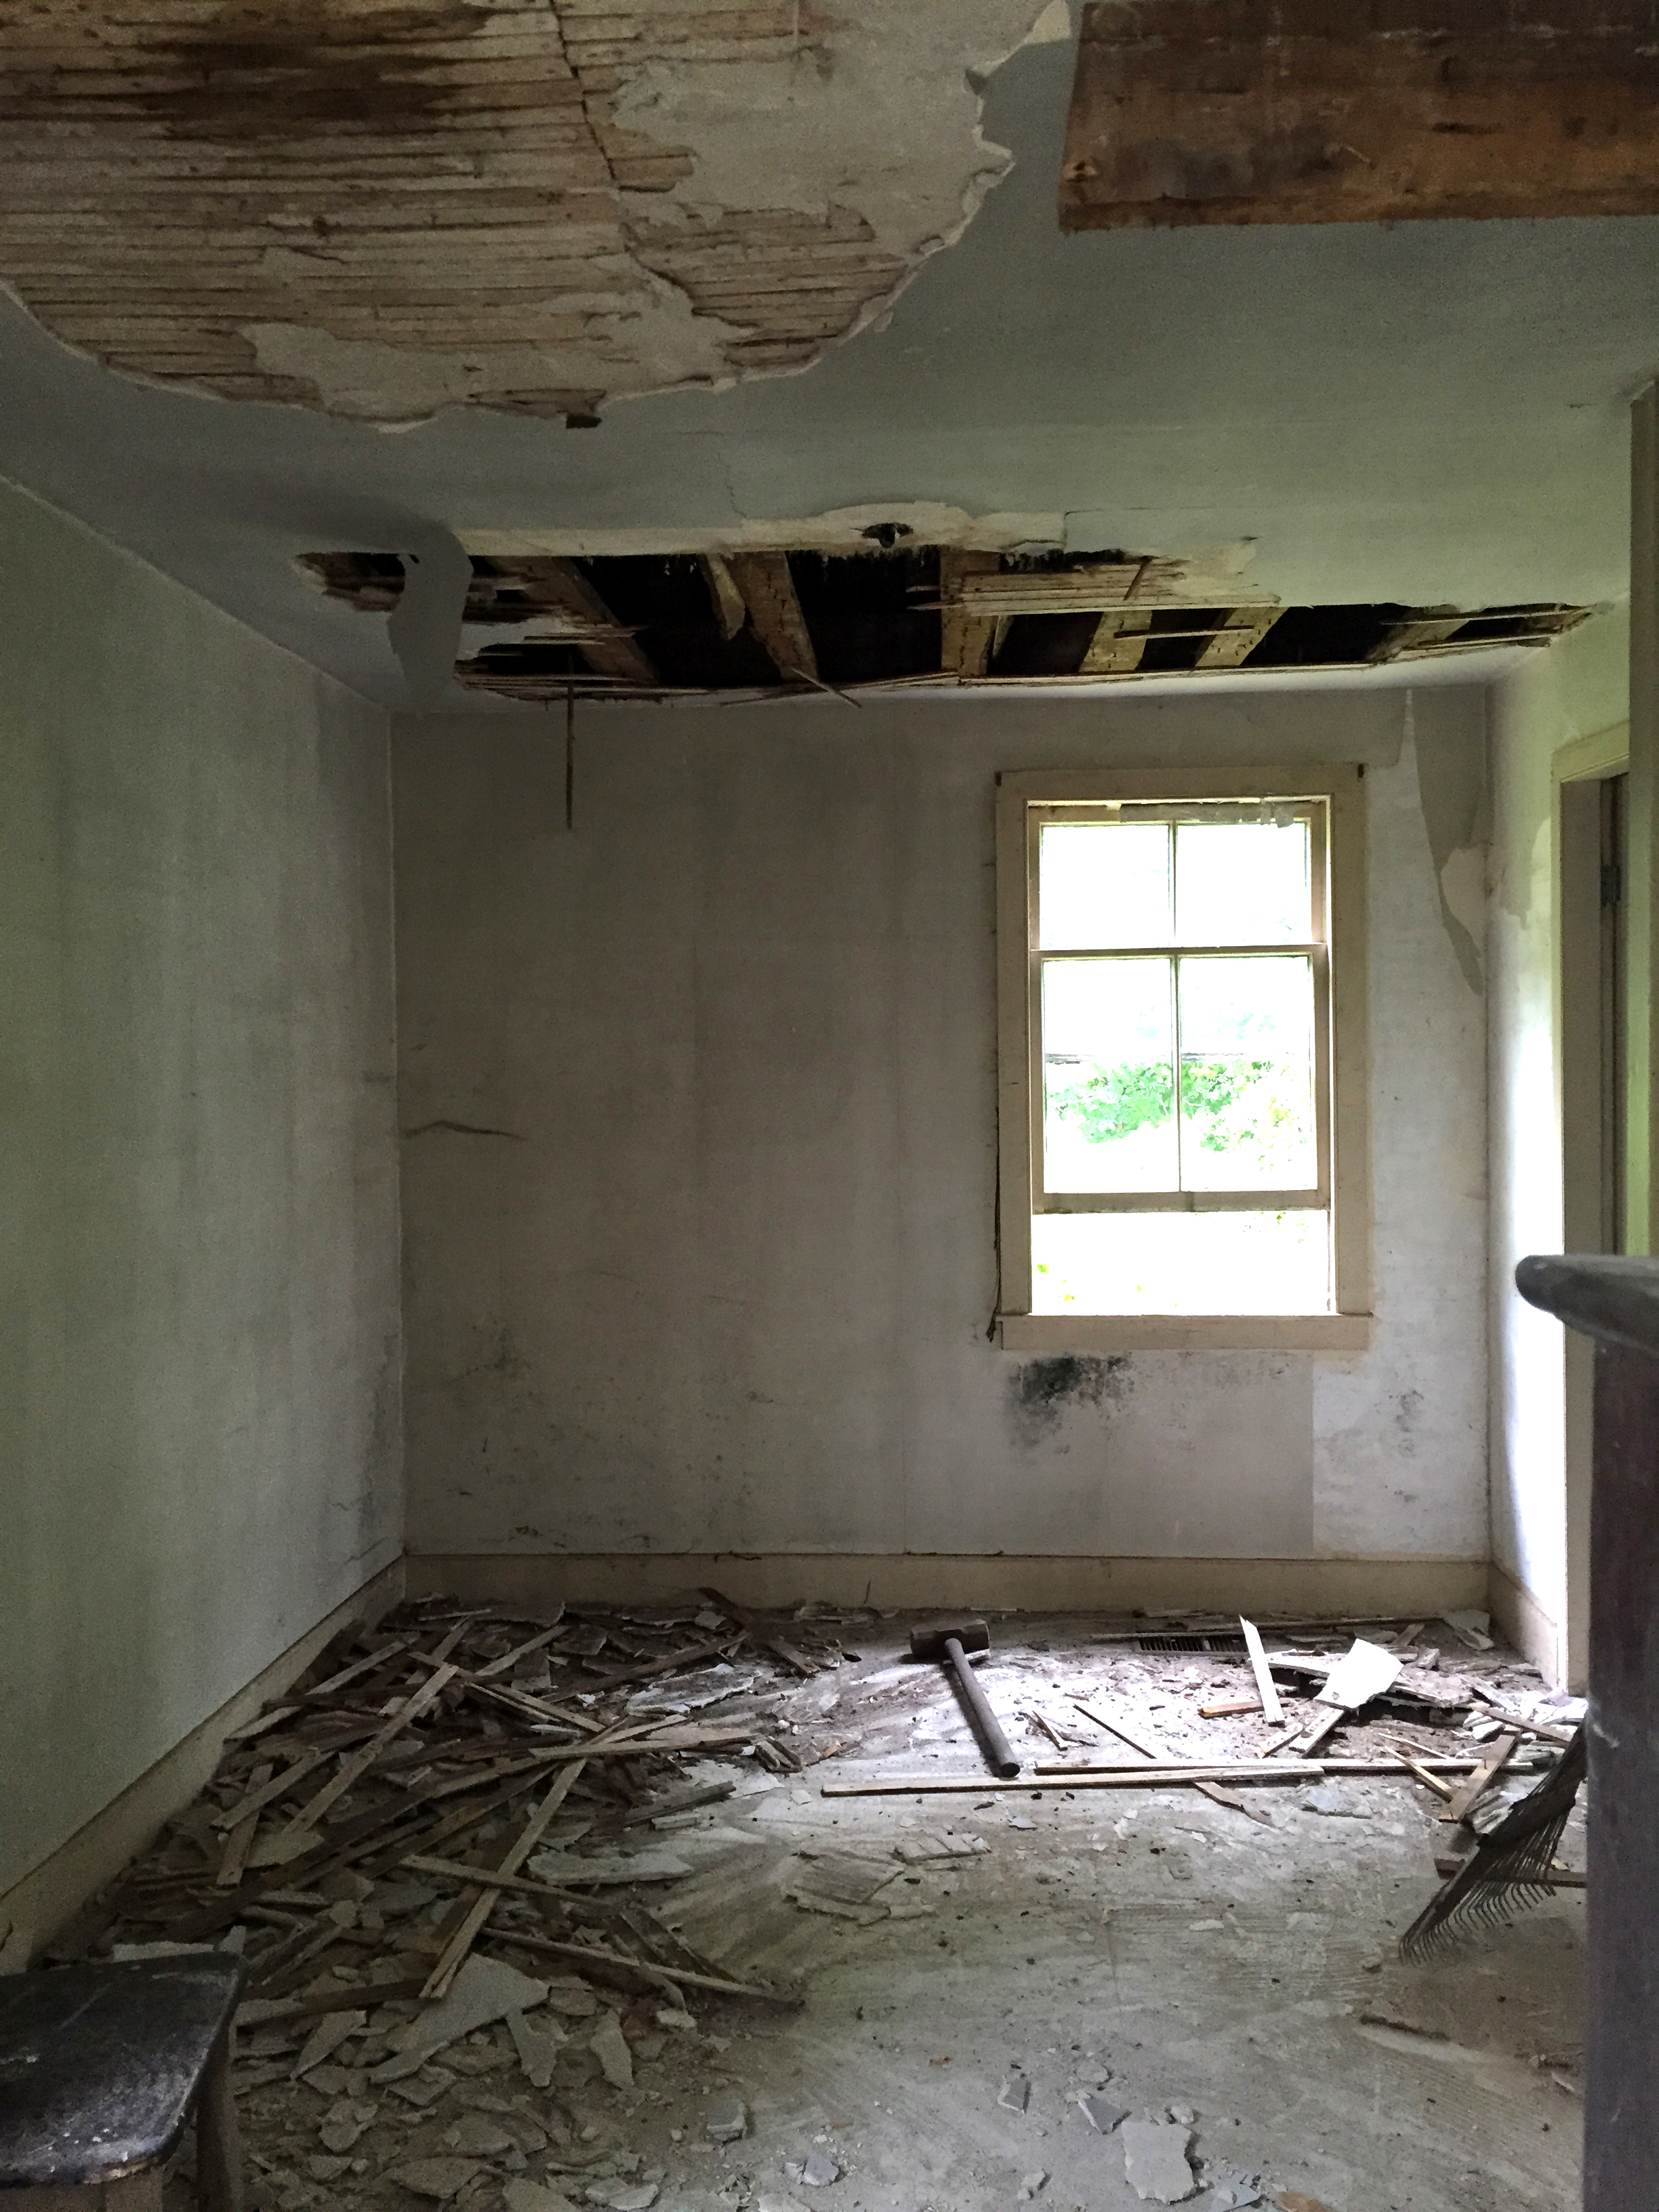
Last month I had the ability to stay up for a week which allowed for me to get a LOT done -- mainly saving the plaster in the downstairs bedroom. While the plaster ceilings were too damaged from moisture to save, the walls were in semi-good shape. There was lots of cracks and places where it had separated from the lathe but I was determined to patch it up rather than take it down. It's original to the house, and I want to save as much as I can.

Last summer I peeled the wallpaper in this room, which took about four hours. Some spots came right off, and some I really had to dig. This time it took about three hours and an entire tub of joint compound to smooth out the major cracks and fill all the nail holes. I wanted to sincerely apologize to every landlord I ignored when they asked me not to put holes in their horse hair plaster. Karma!

This is what it looked like while I was in progress:

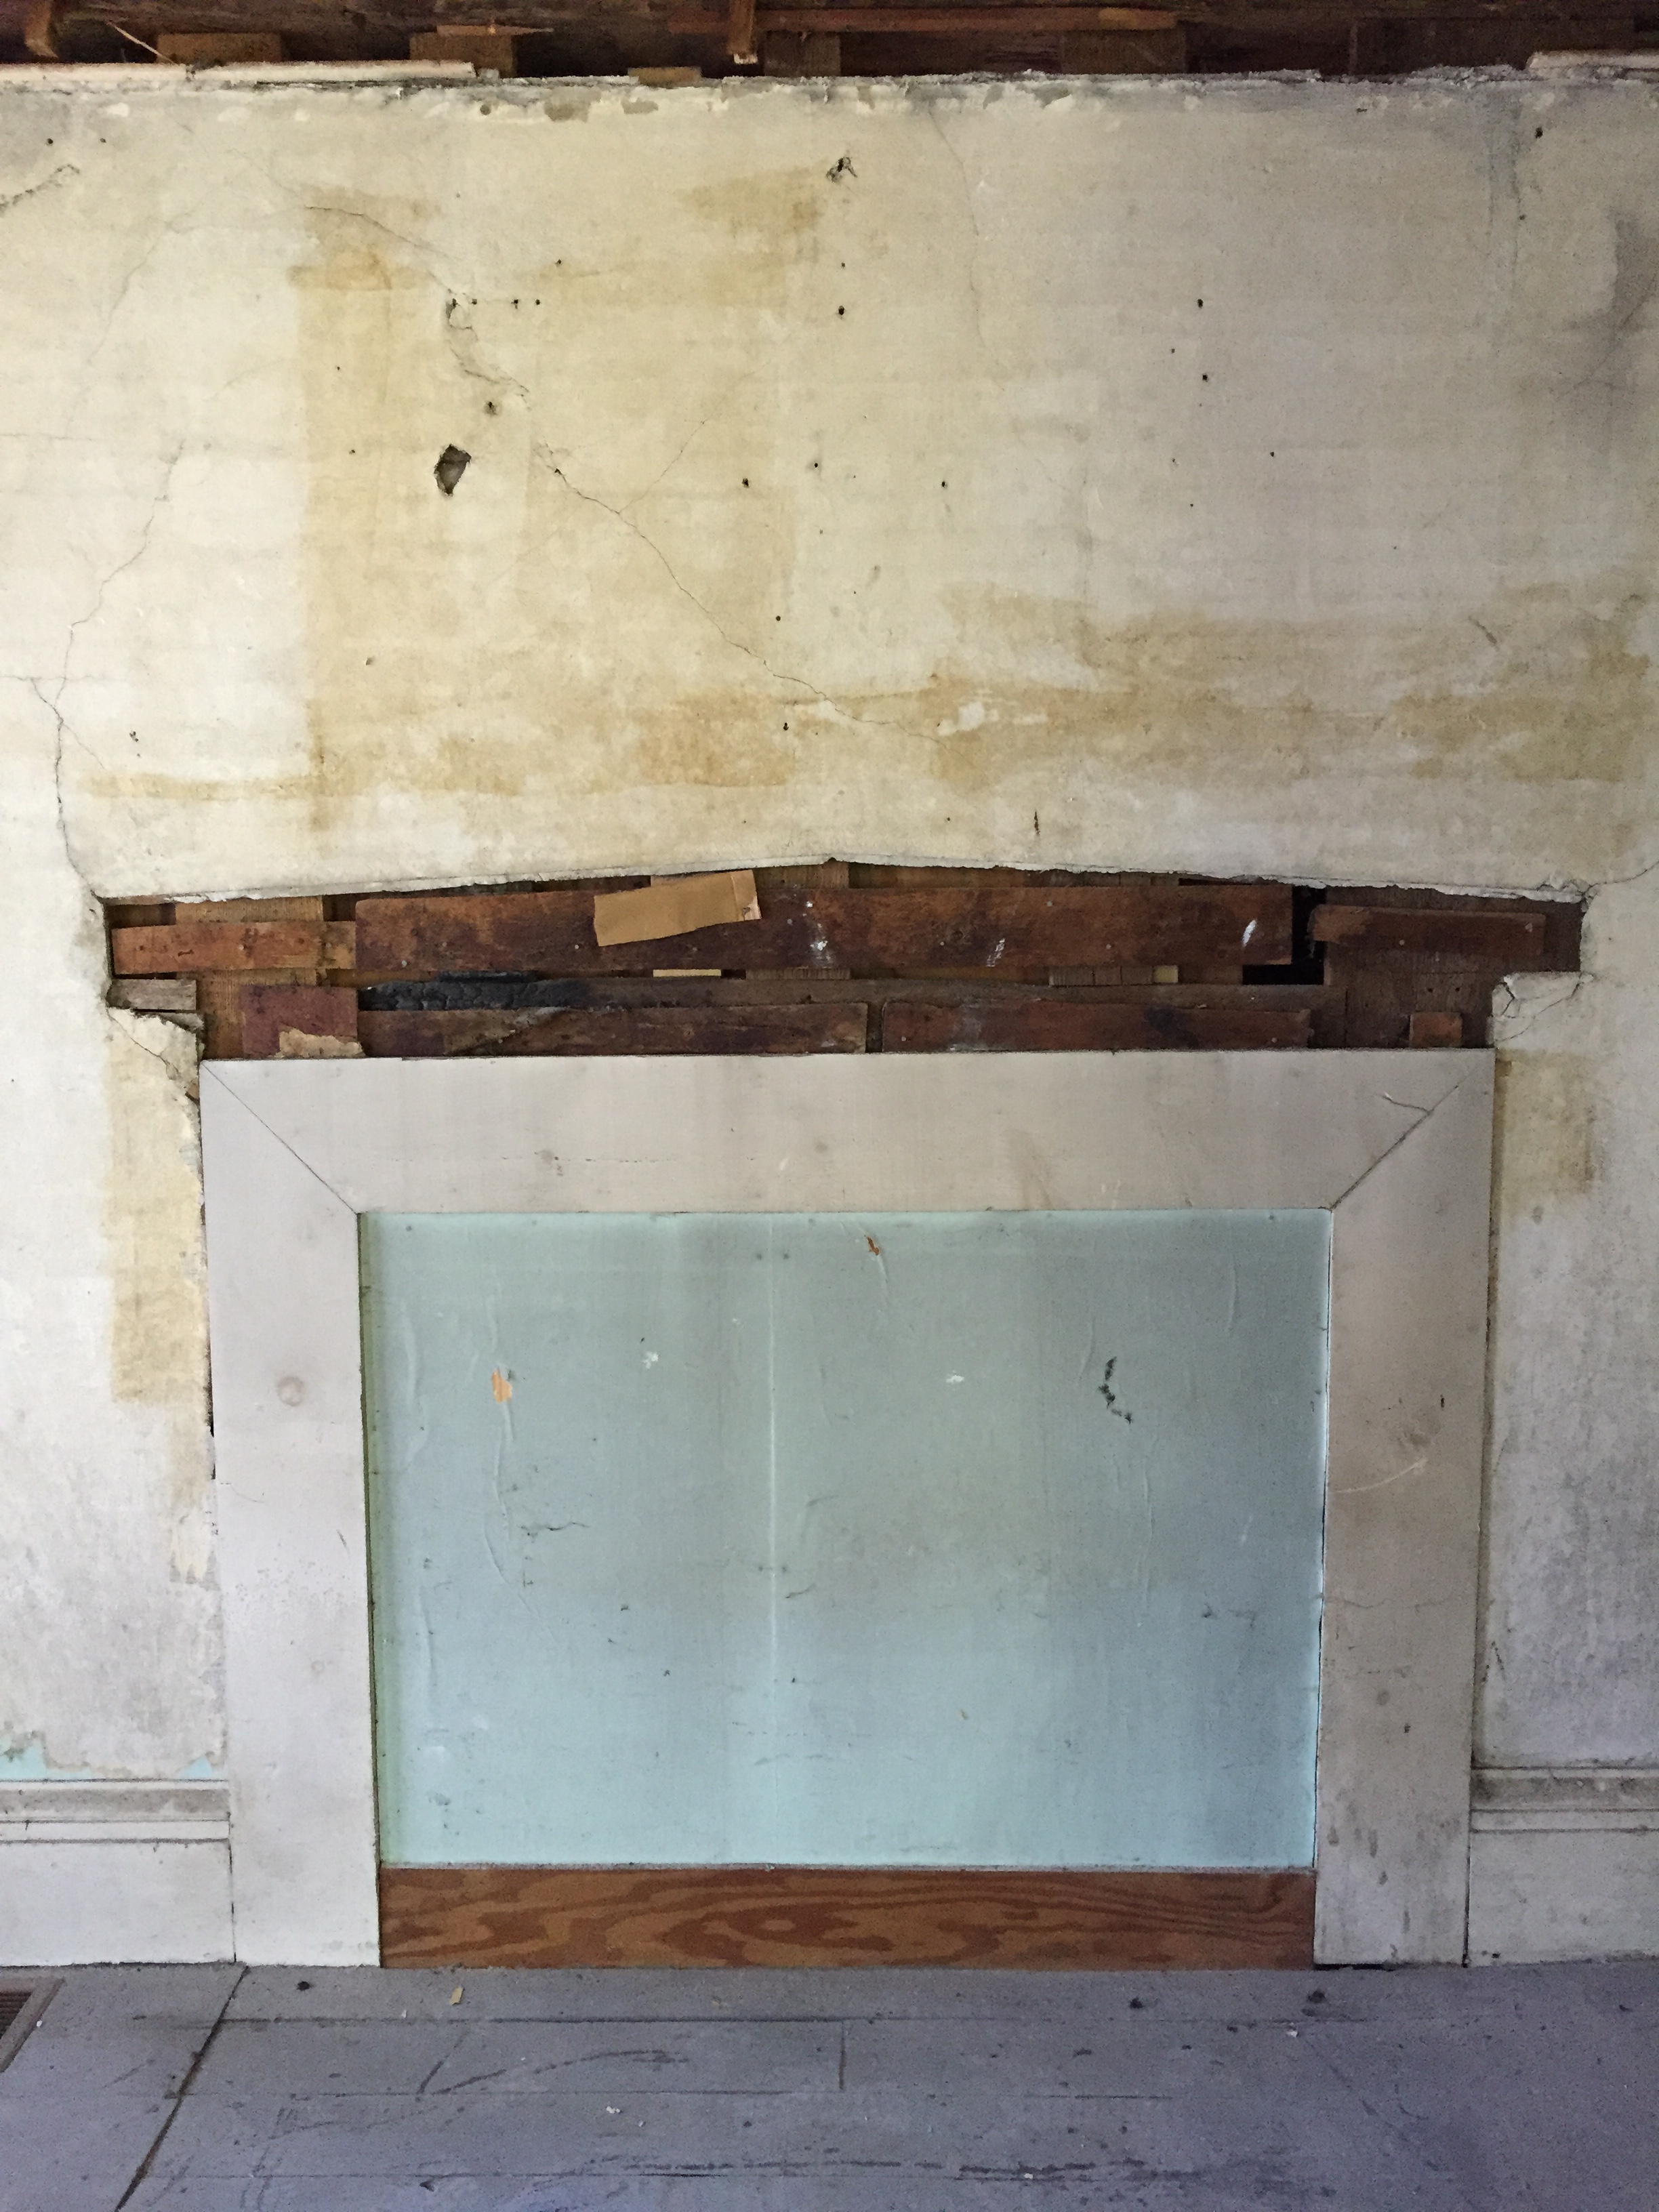
The space above the old fireplace was the worst -- probably because this is where they always had photos hanging and over the years the wear and tear took a toll. I let my first layer of joint compound dry for 24 hours, and then added approximately 1,000,000 plaster buttons, added another layer of joint compound, and then let that dry for 24 hours. I sanded it all down and then painted two layers of Kilz on every surface in the room -- including the trim. The trim had already been painted, but was stained from years of smoke from the fireplaces and kitchen wood stove. I started to clean it, but realized we'd probably prime it anyway so I saved my arm strength and just whipped right over it.

This is the result:

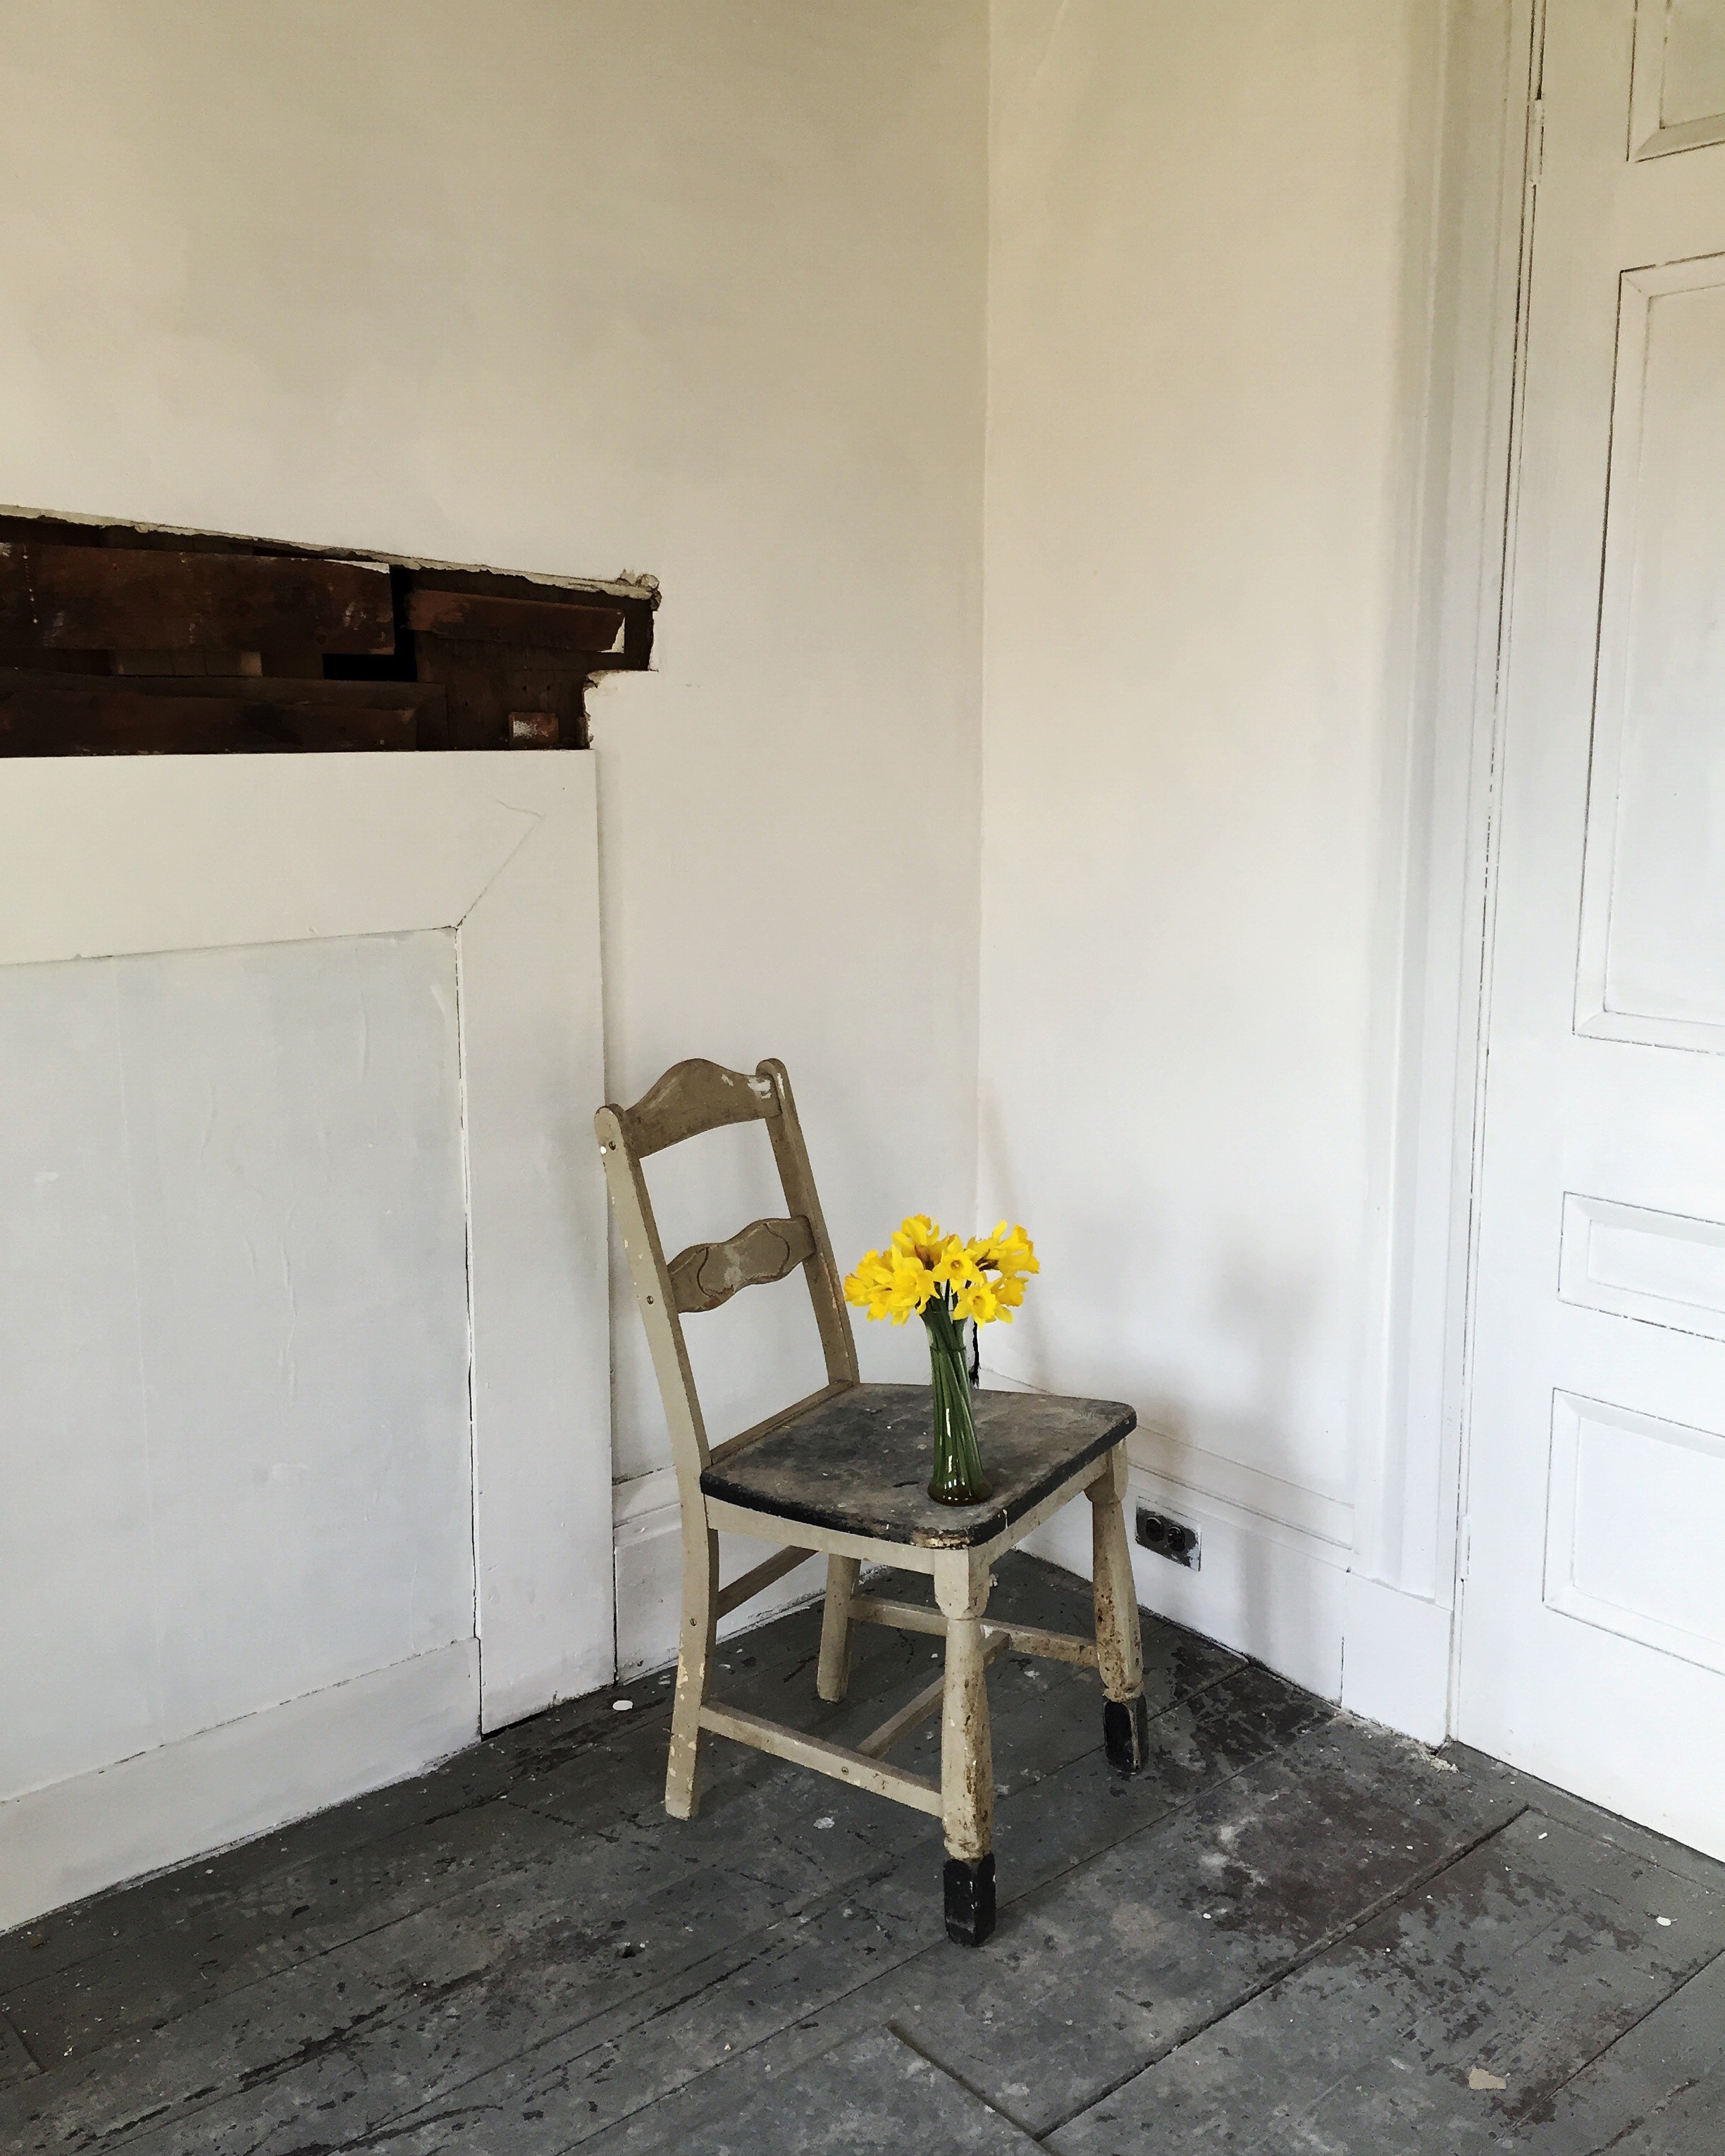
Oh, and those daffodils are wild from the back yard.

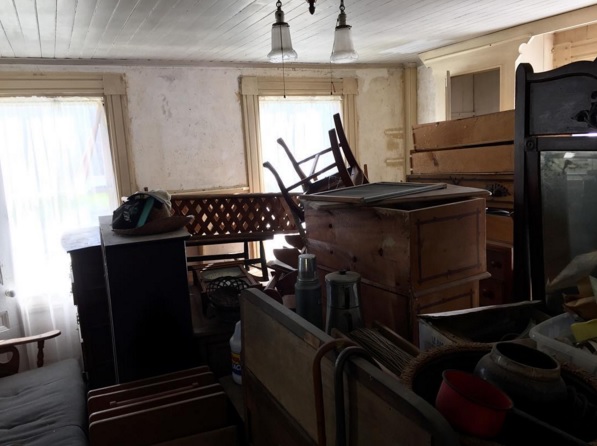
Words and photos cannot express what a difference this makes to the room. It looks so fresh and clean and SAVED! When we started this project this room was FULL of furniture and tools with an enormous hole in the ceiling and peeling wallpaper. It now looks like a space you wouldn't mind sleeping in -- besides the fact that it still needs a ceiling... but we'll get to that!

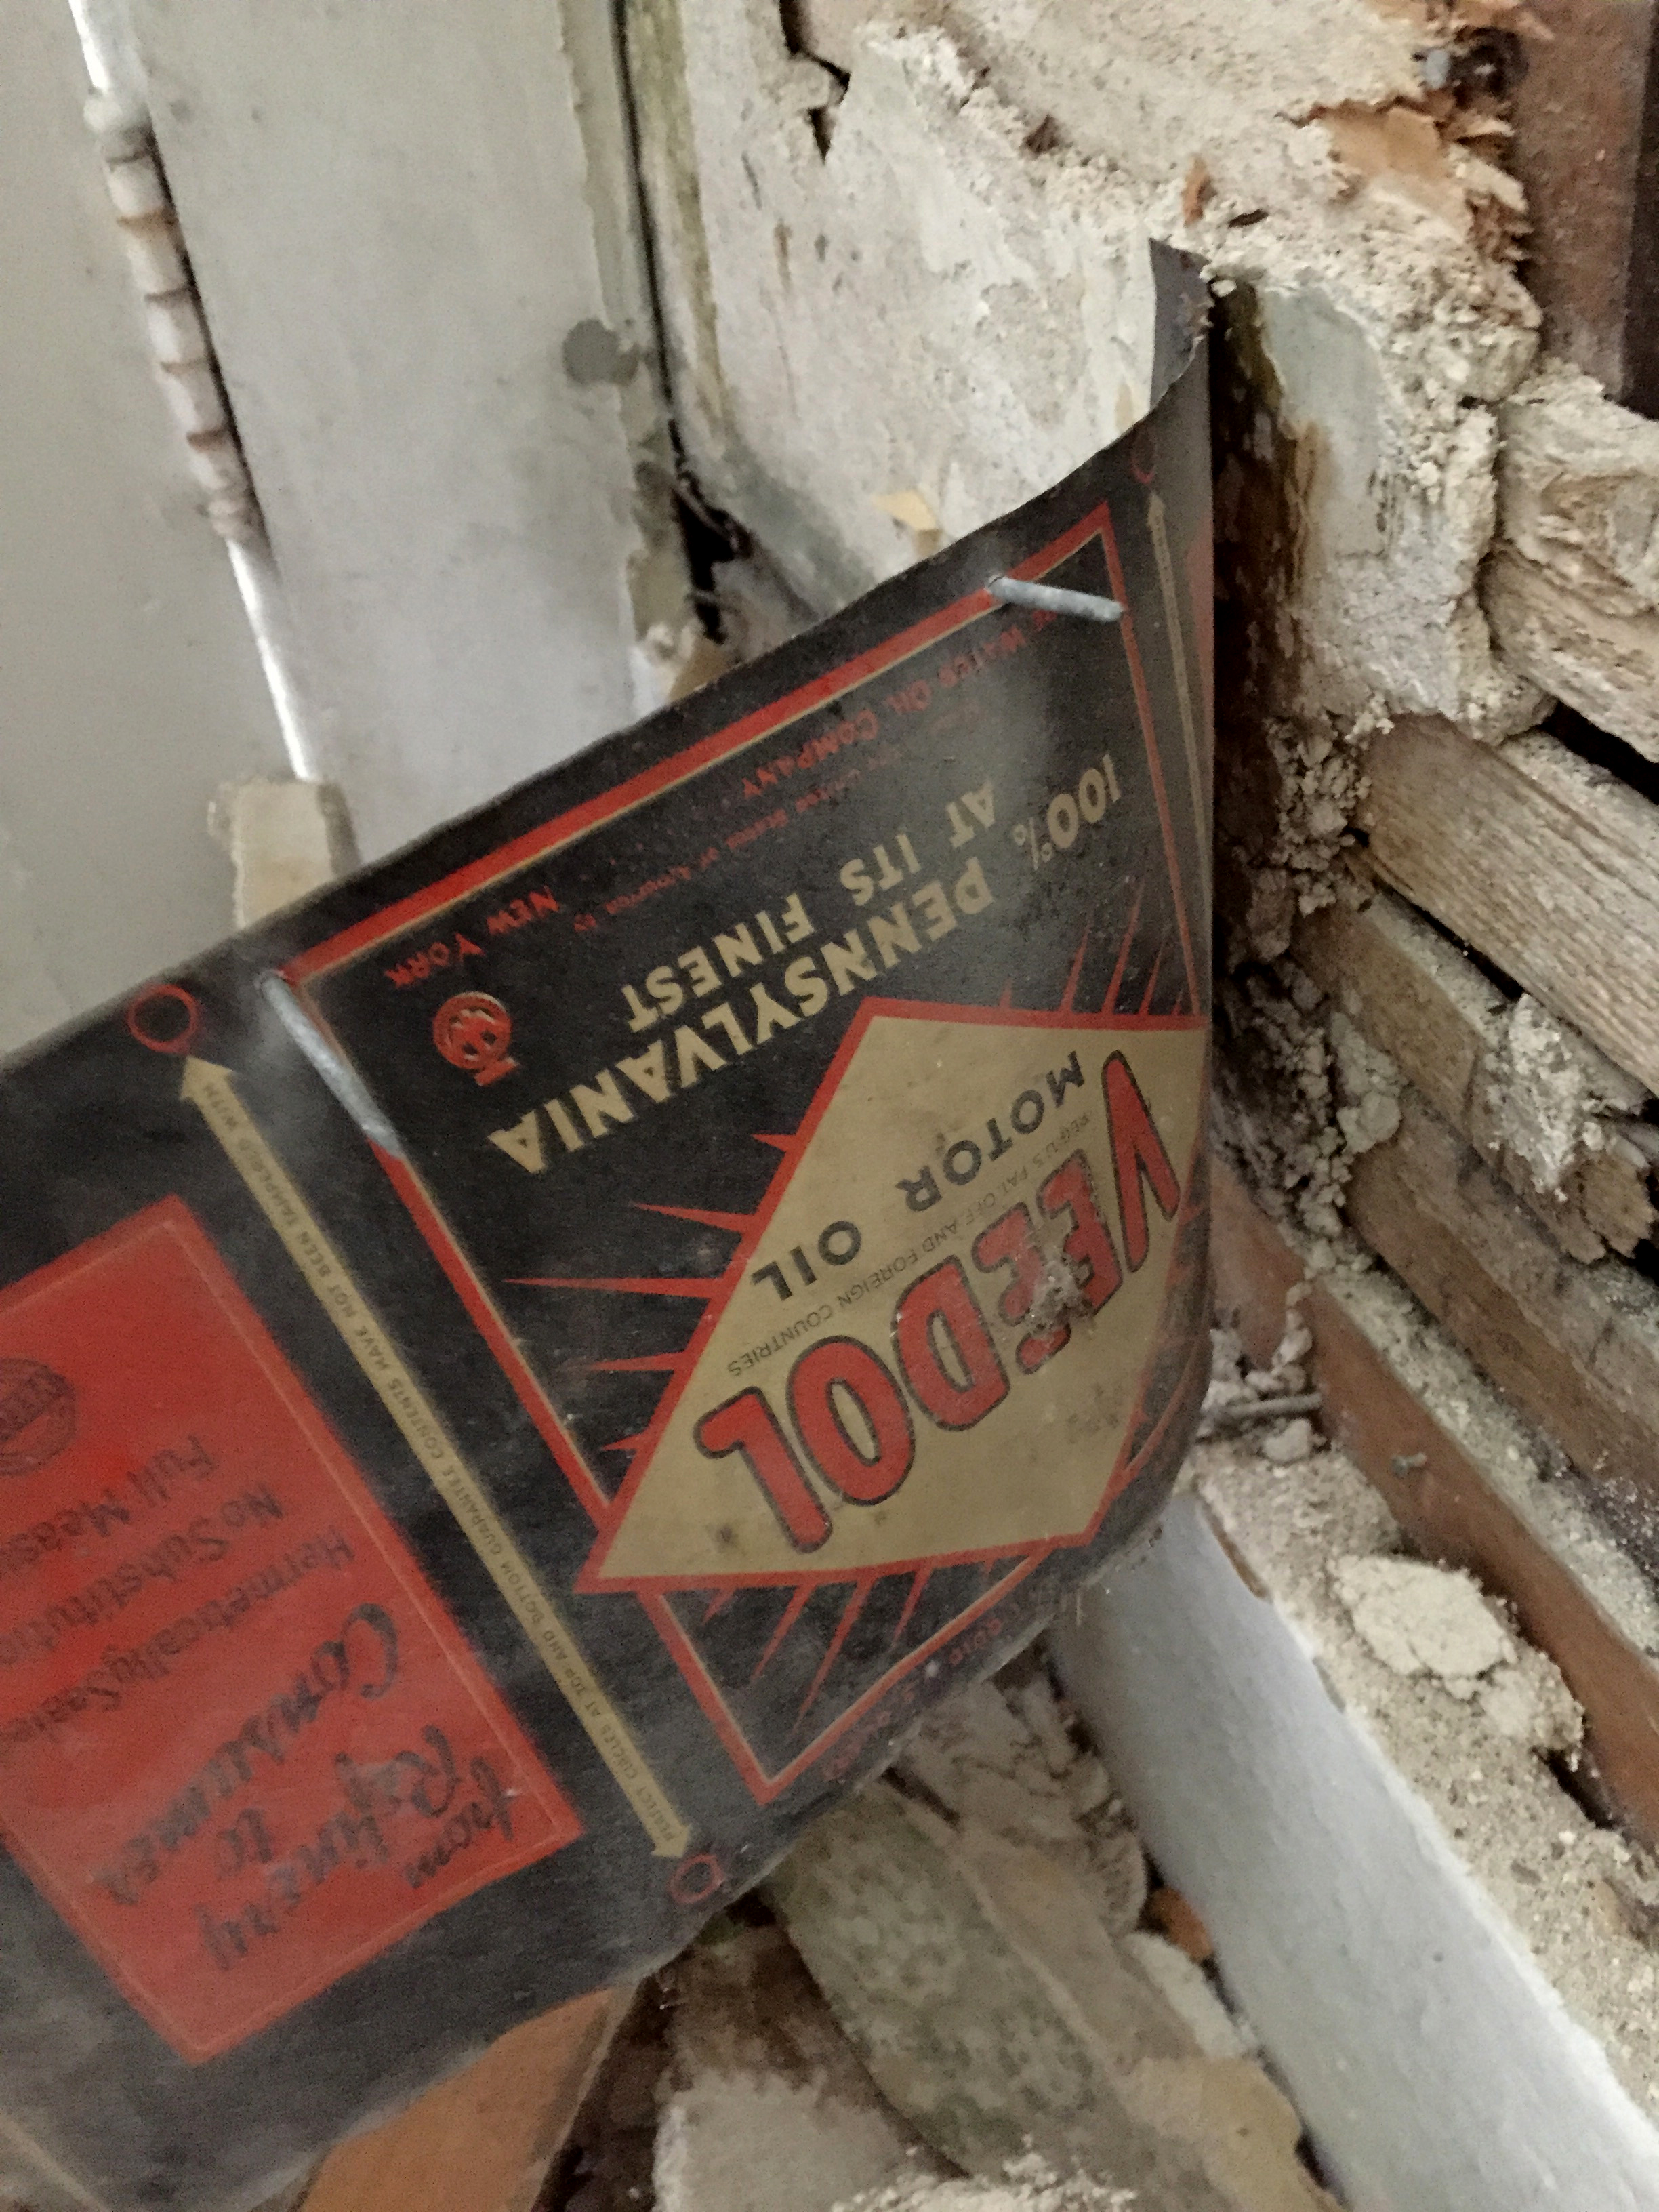
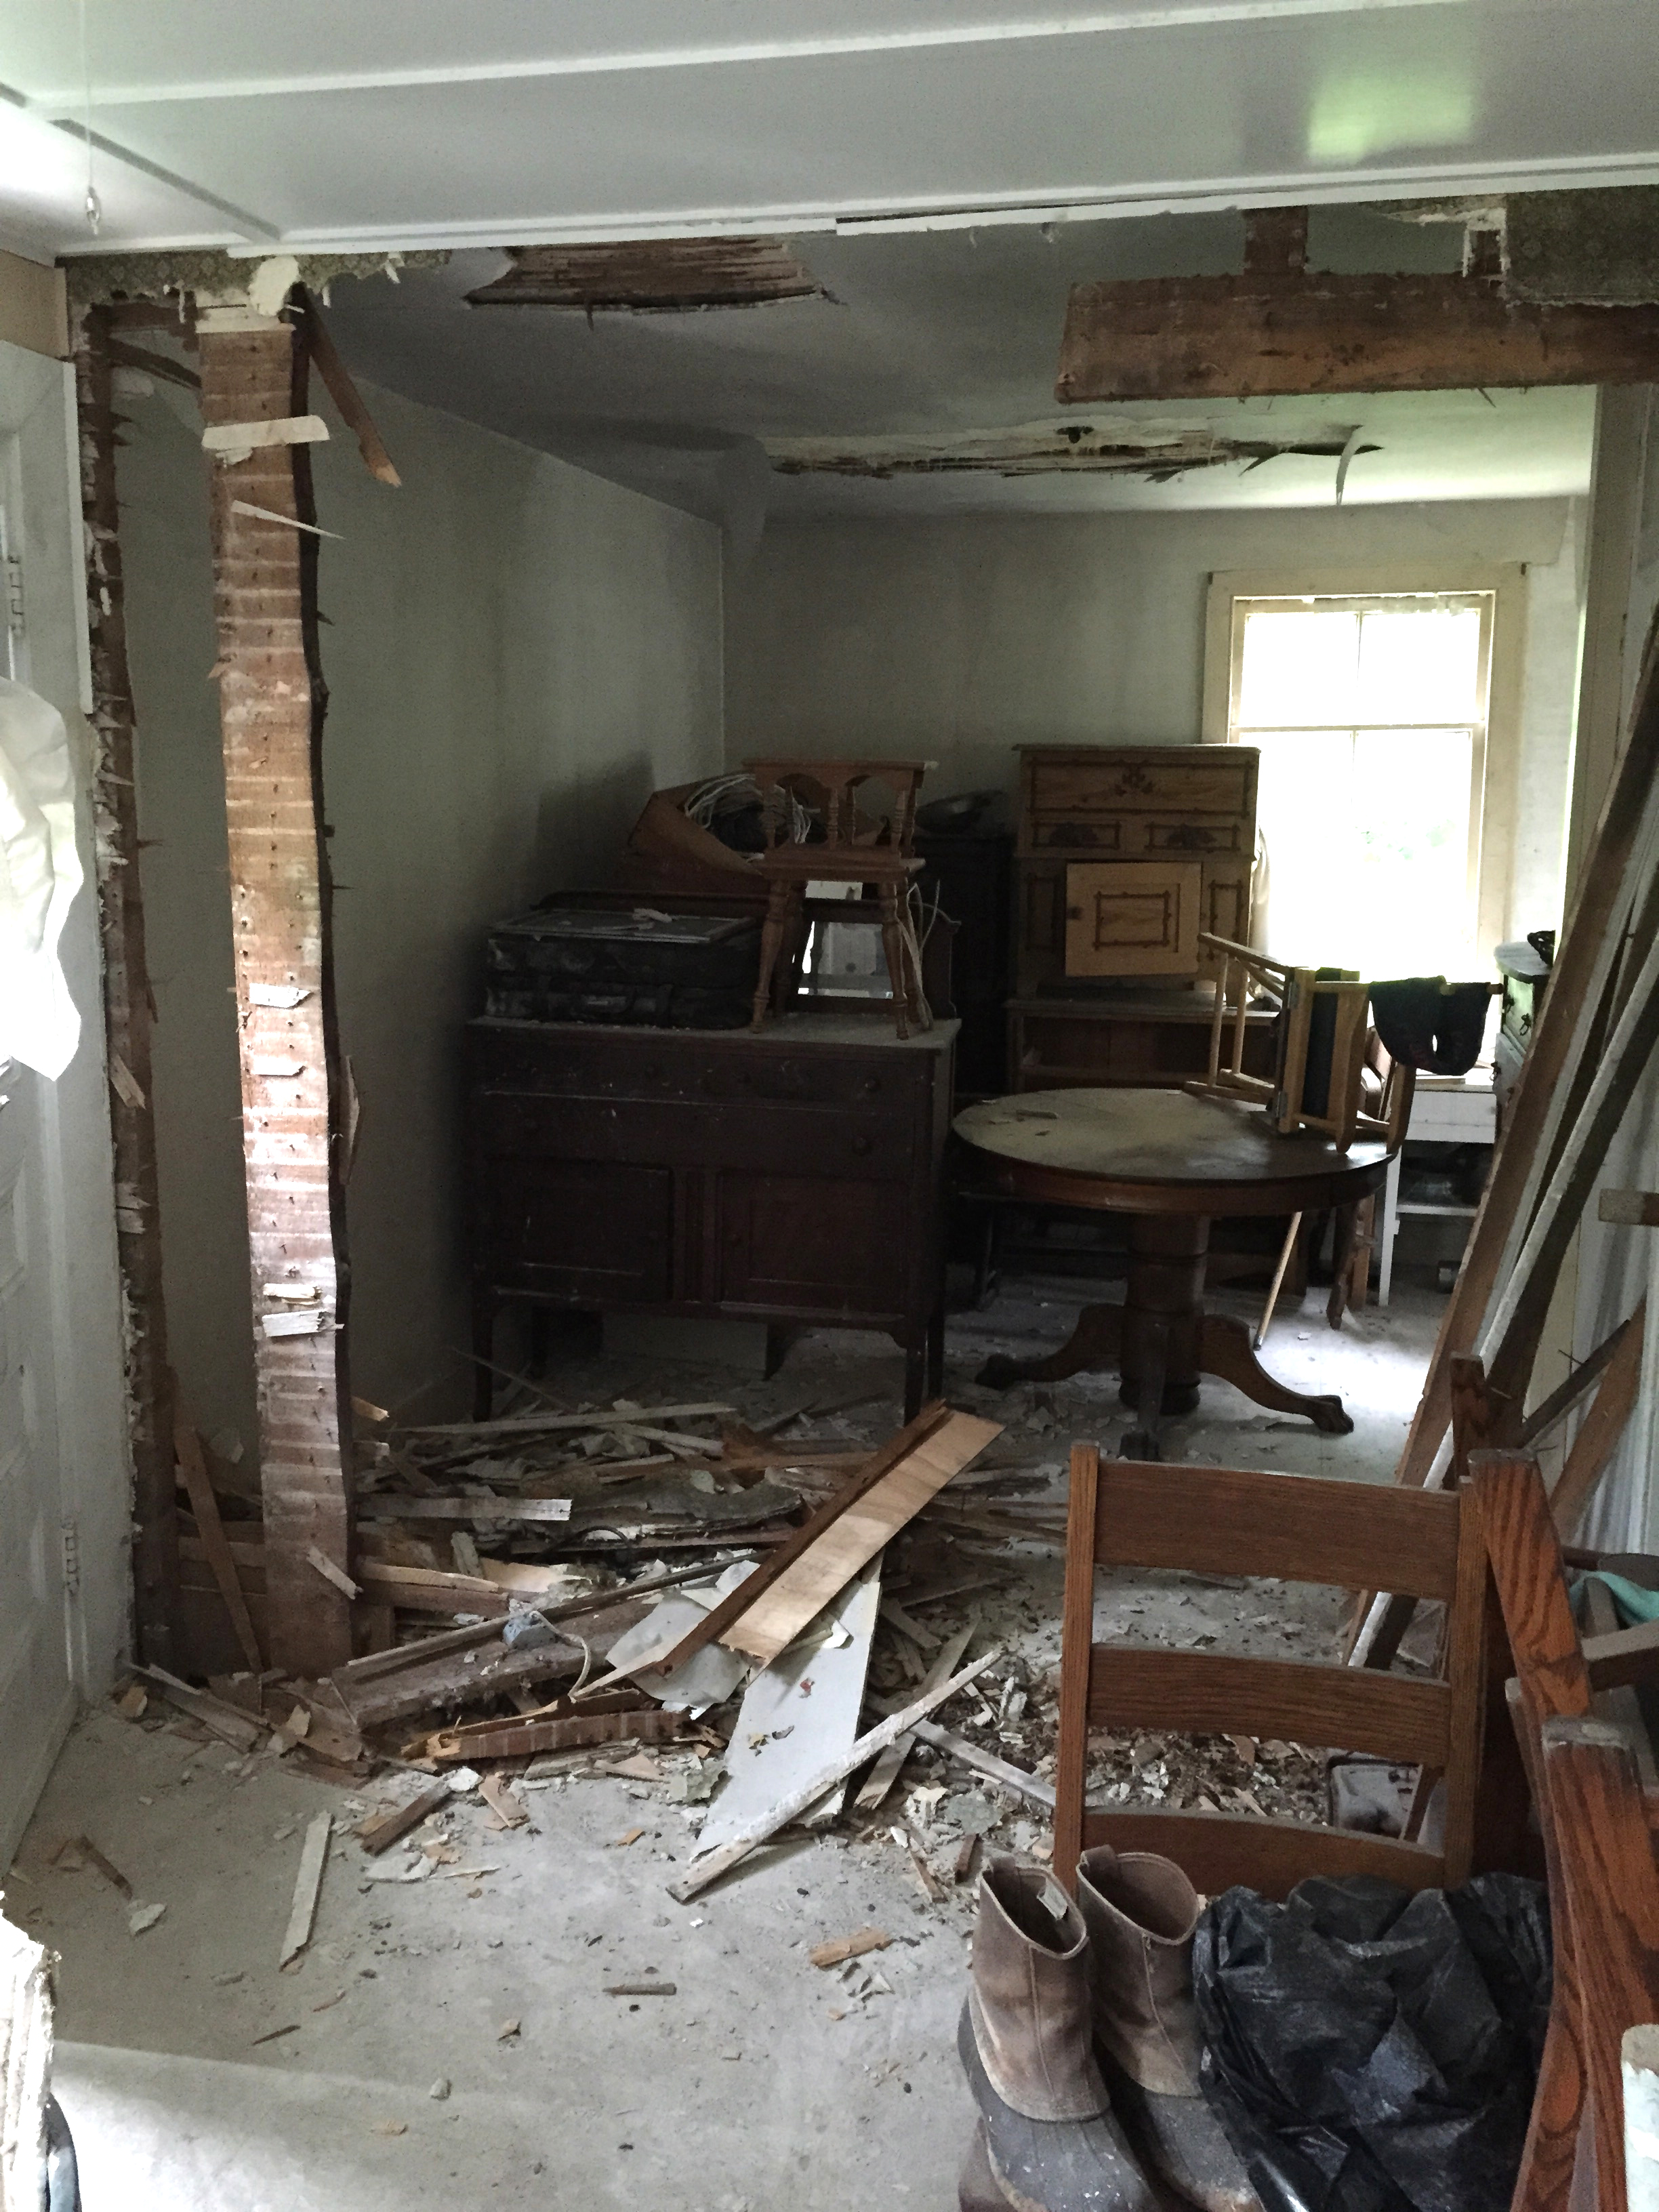
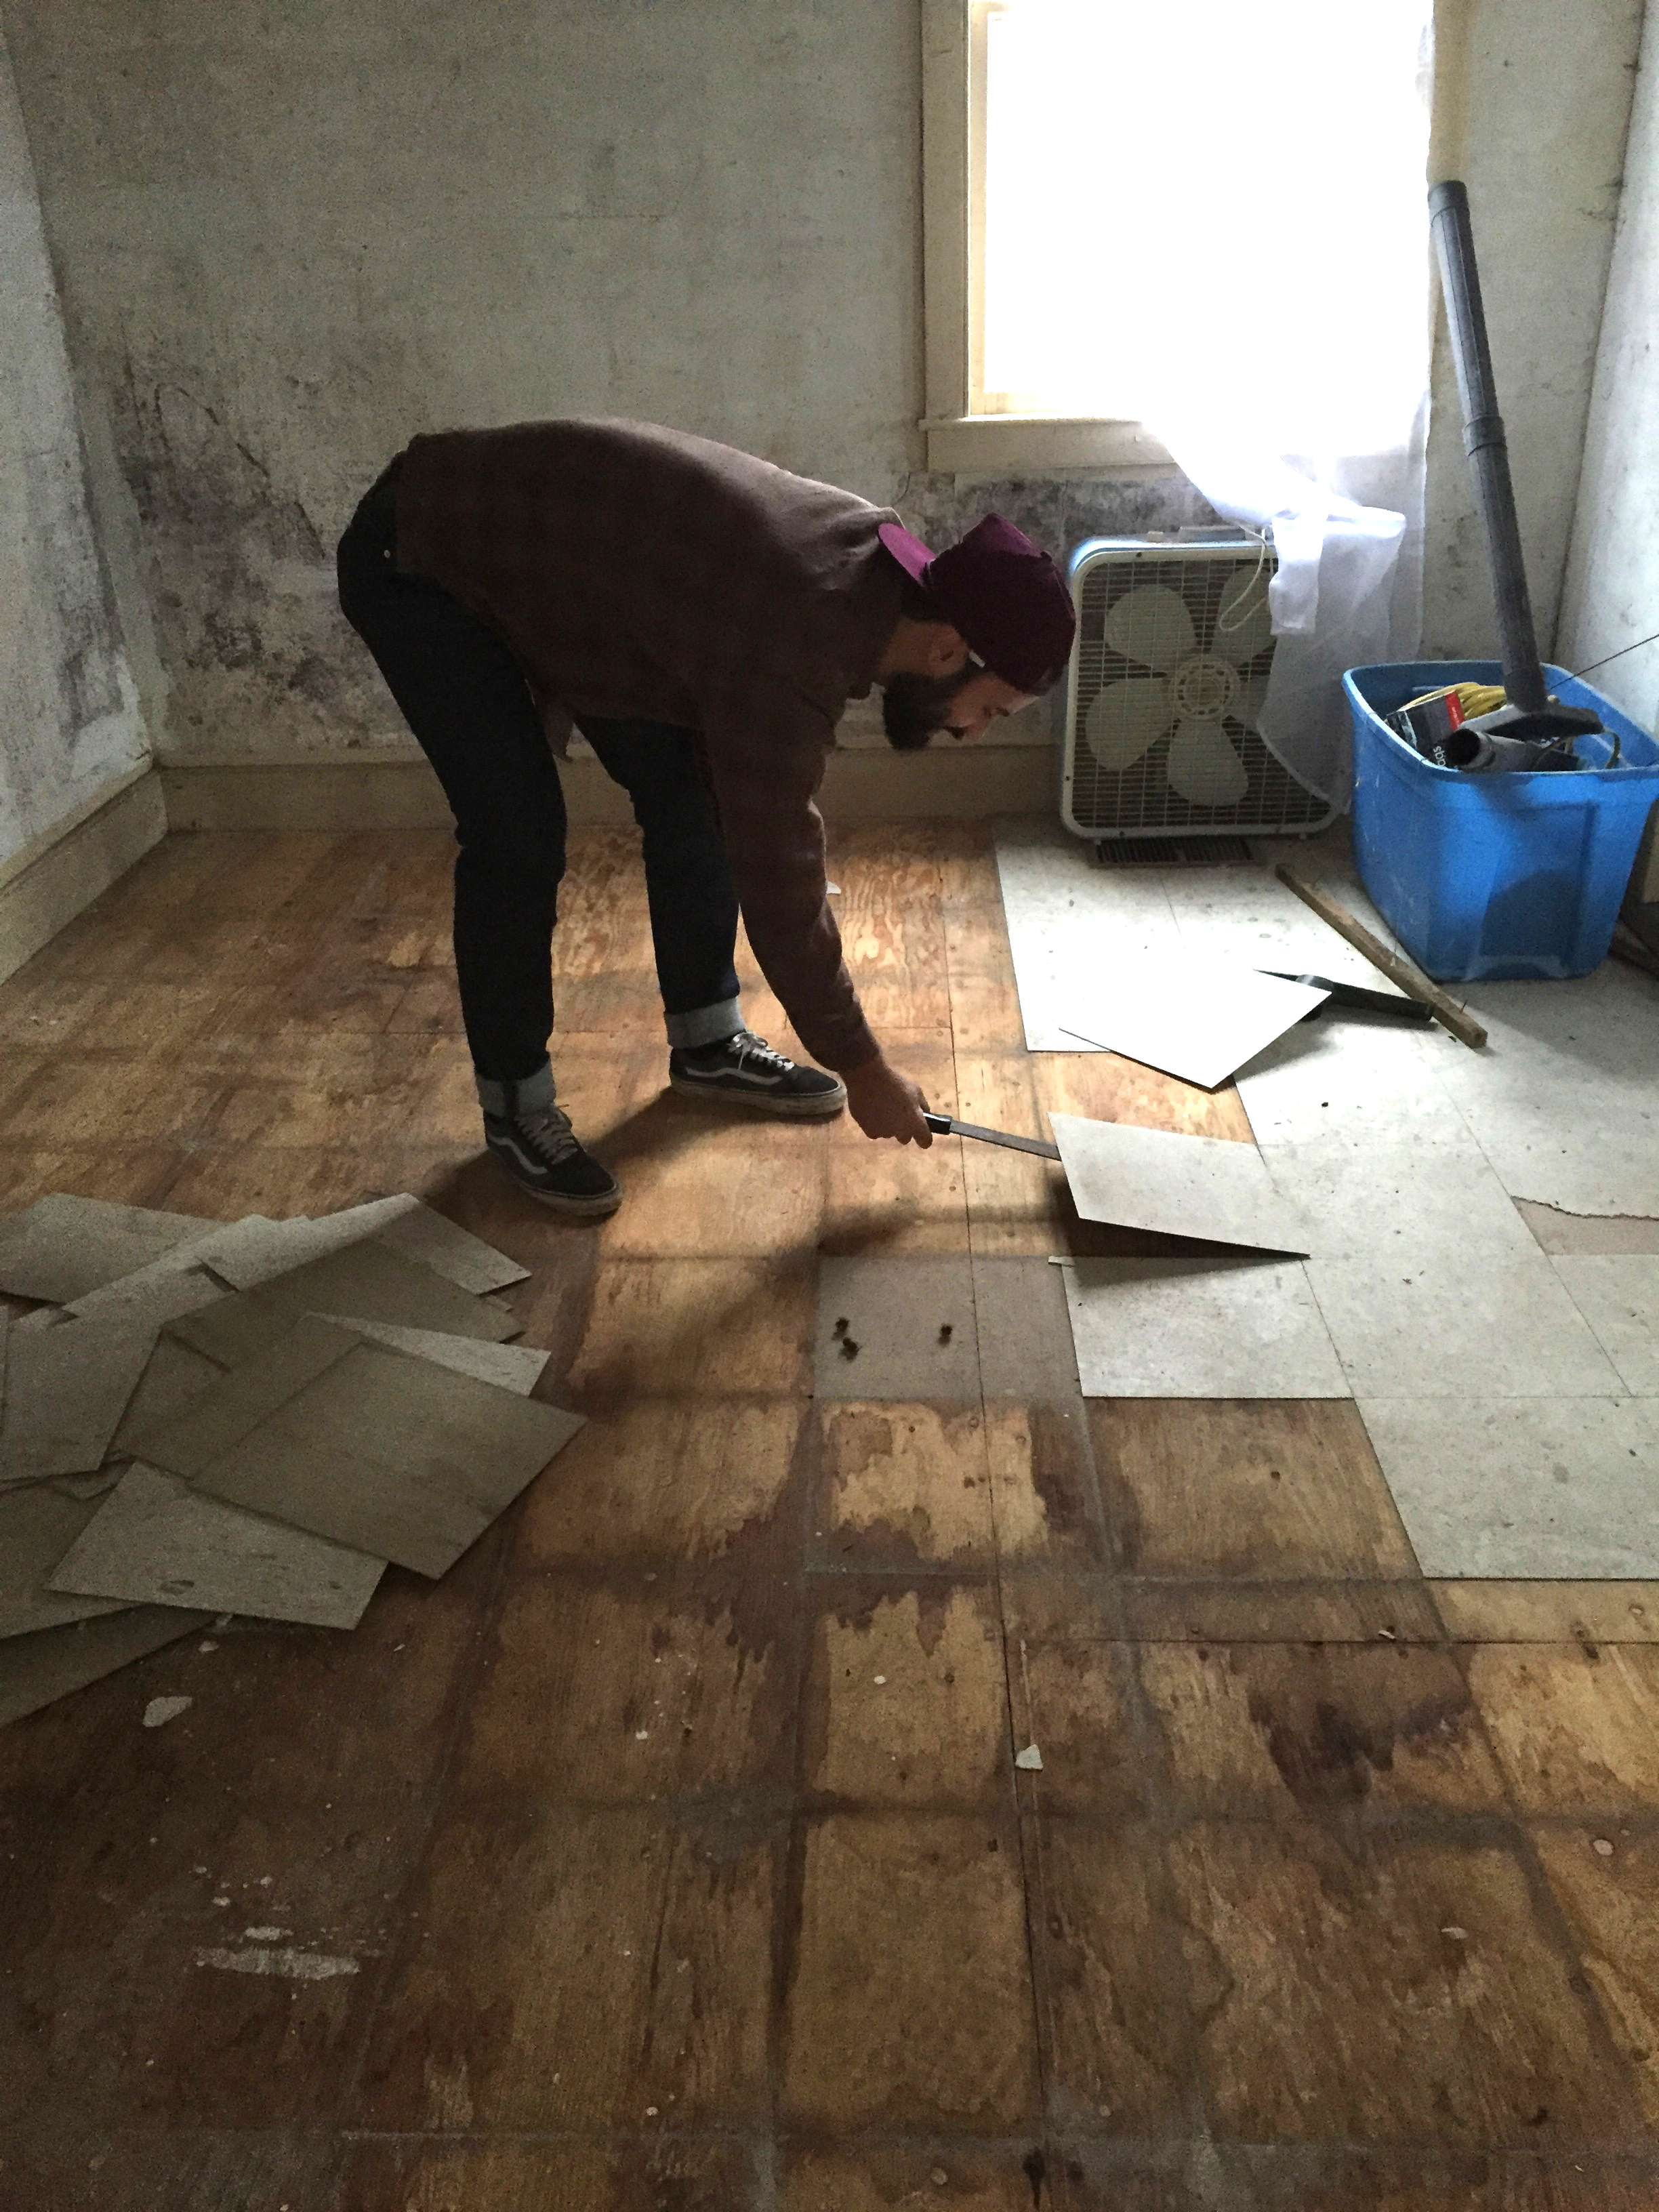
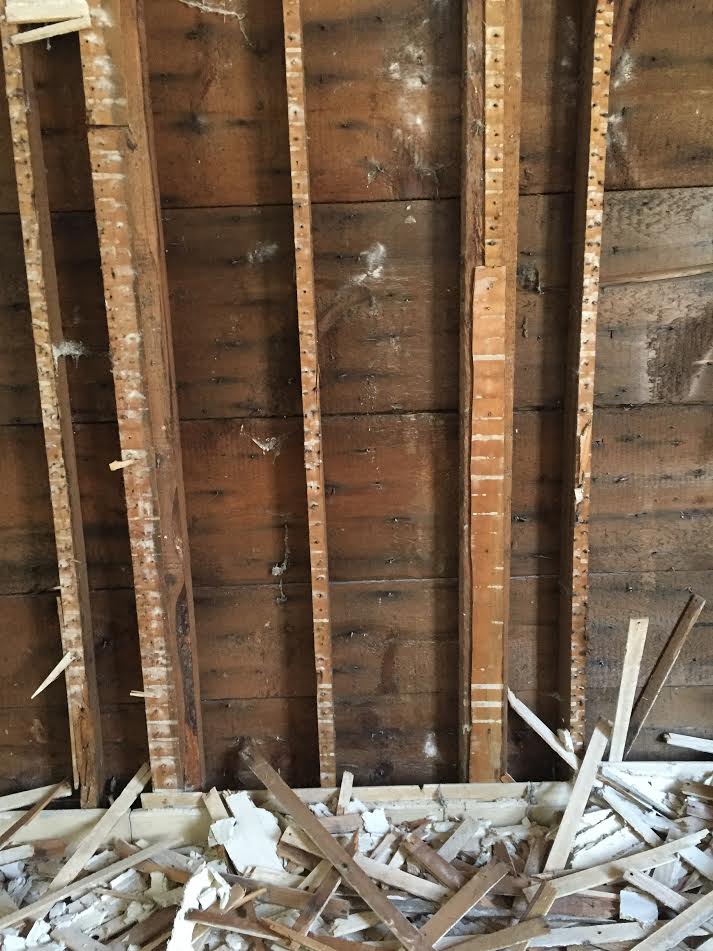
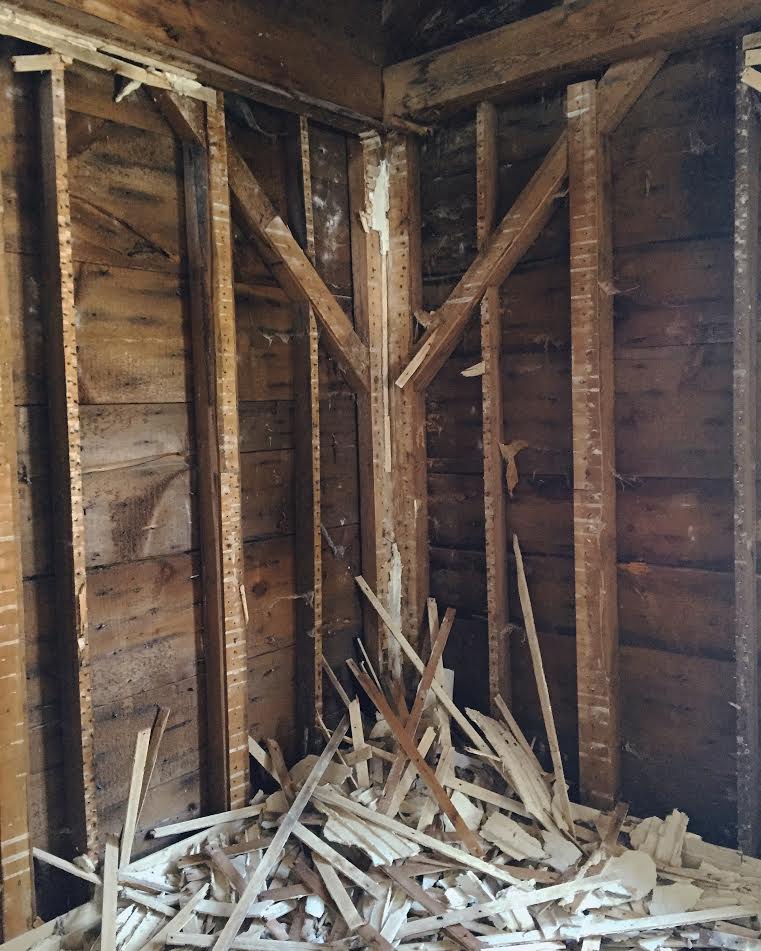
The other major project we did was demo in the dining room and kitchen. The plaster in the dining room could not be saved -- it was moldy and wet and crumbling off the walls. We took this down easily and it was neat to see the real bones of the house. Look how wide those planks are!

Then we started working on removing the old cabinets. This was a chore -- I'm not sure when they were put in, but there was wallpaper behind them when we took them down so I am going to guess they were put in sometime in the 60's. And they were really in there. It took my dad and husband three hours to get it all out because they were connected in the most intricate way. We could have gone to town slicing and smashing them out, but we wanted to (and succeeded in) saving them to use for storage in the basement.

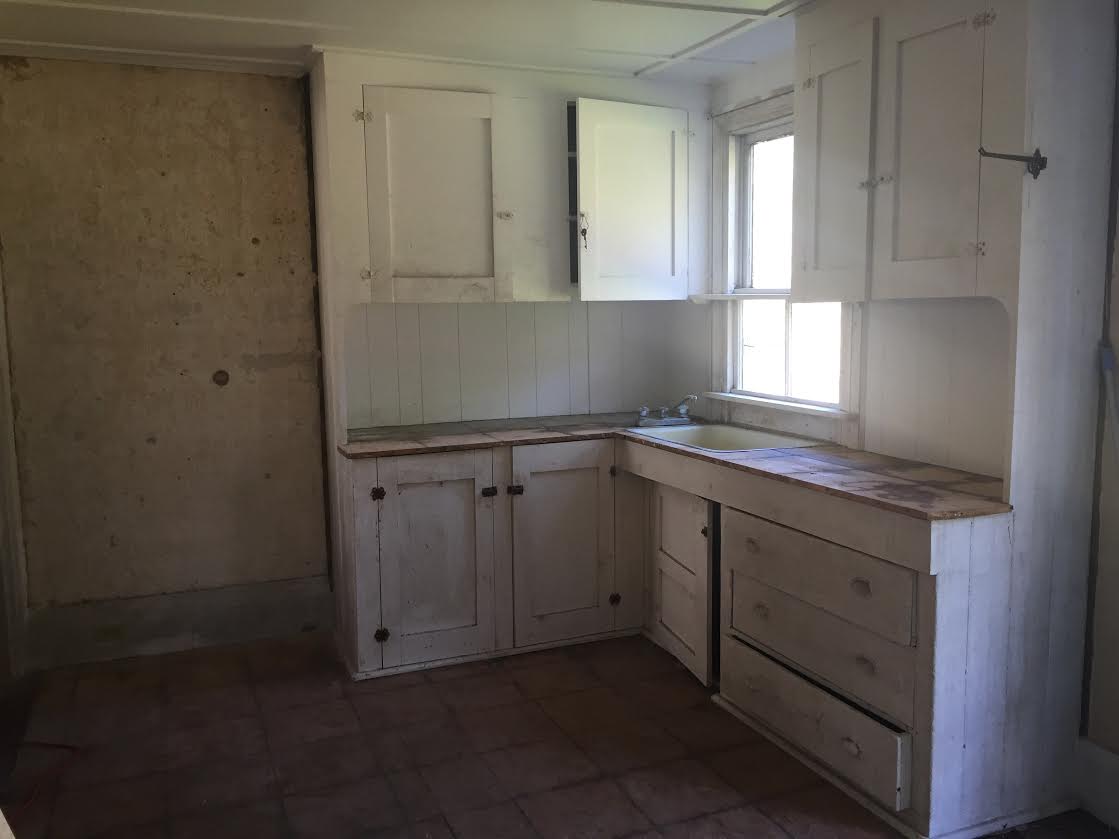
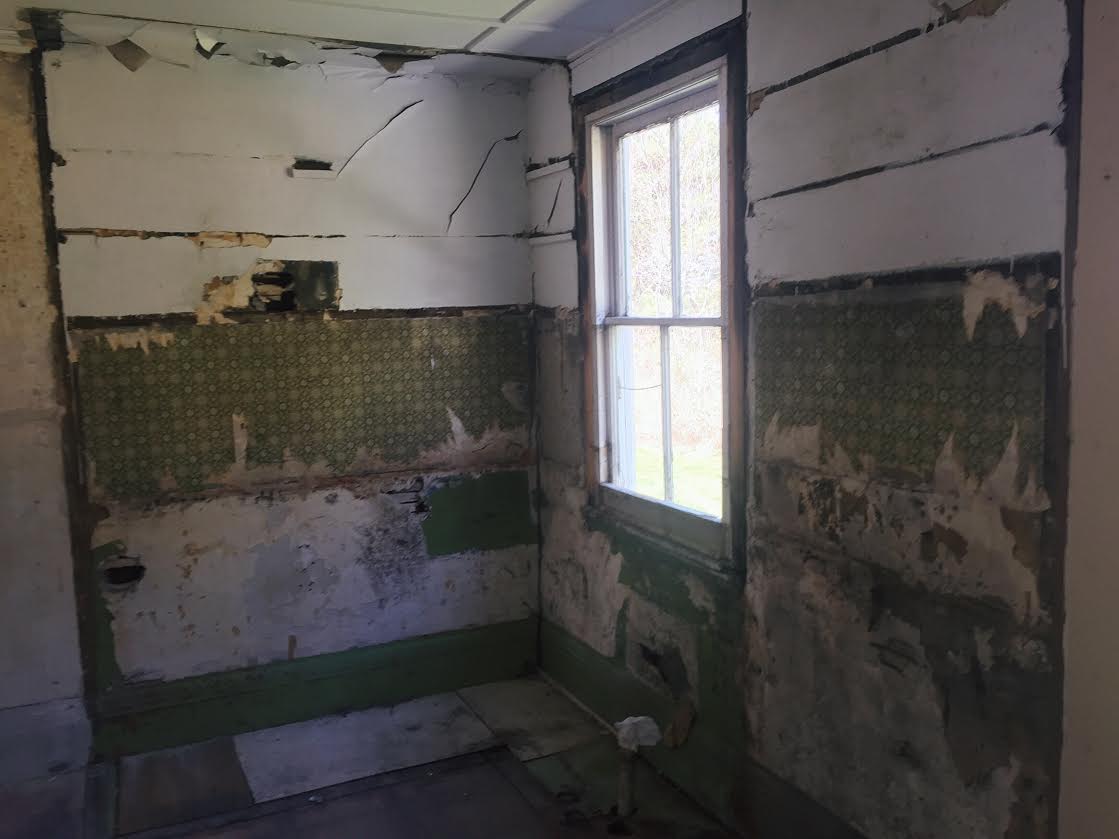
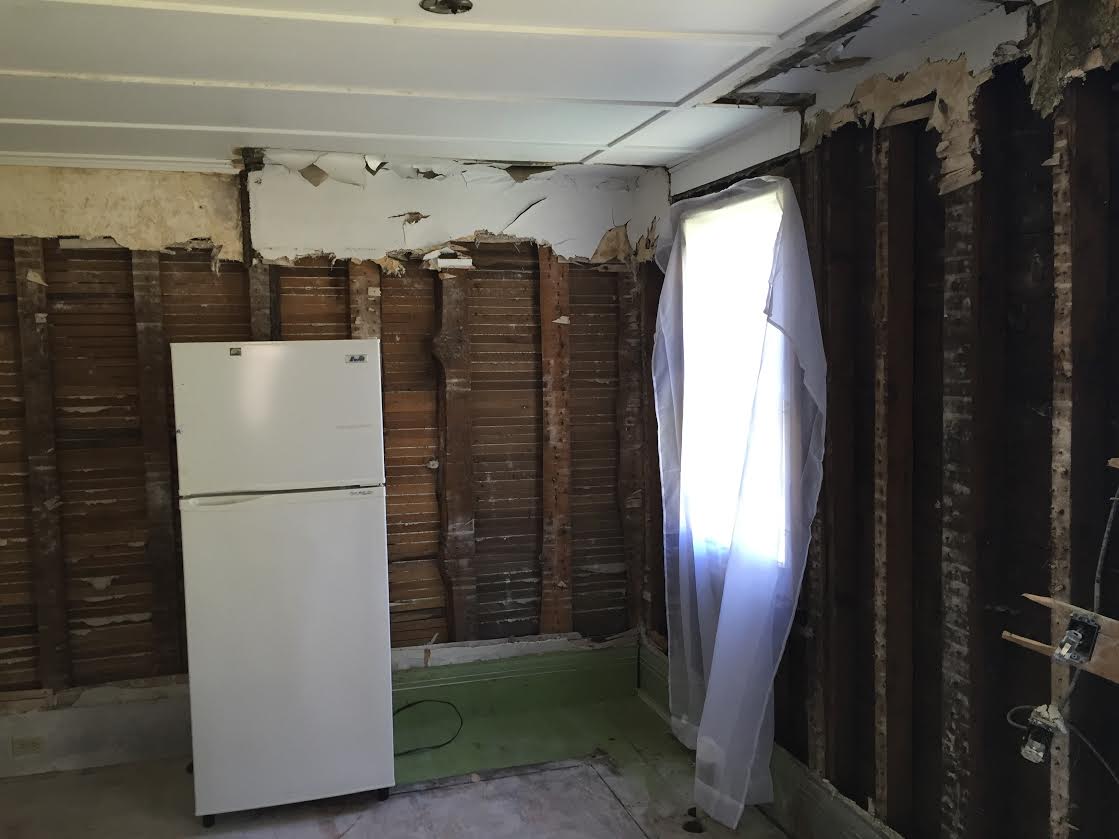
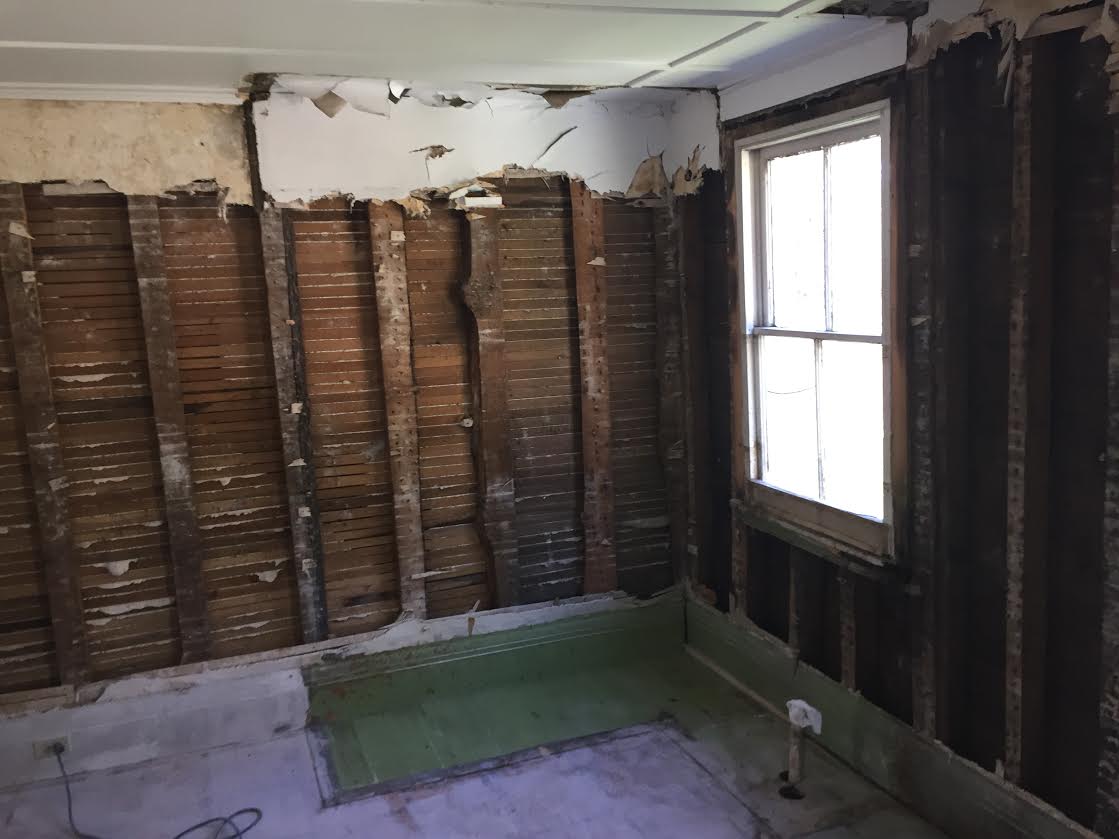
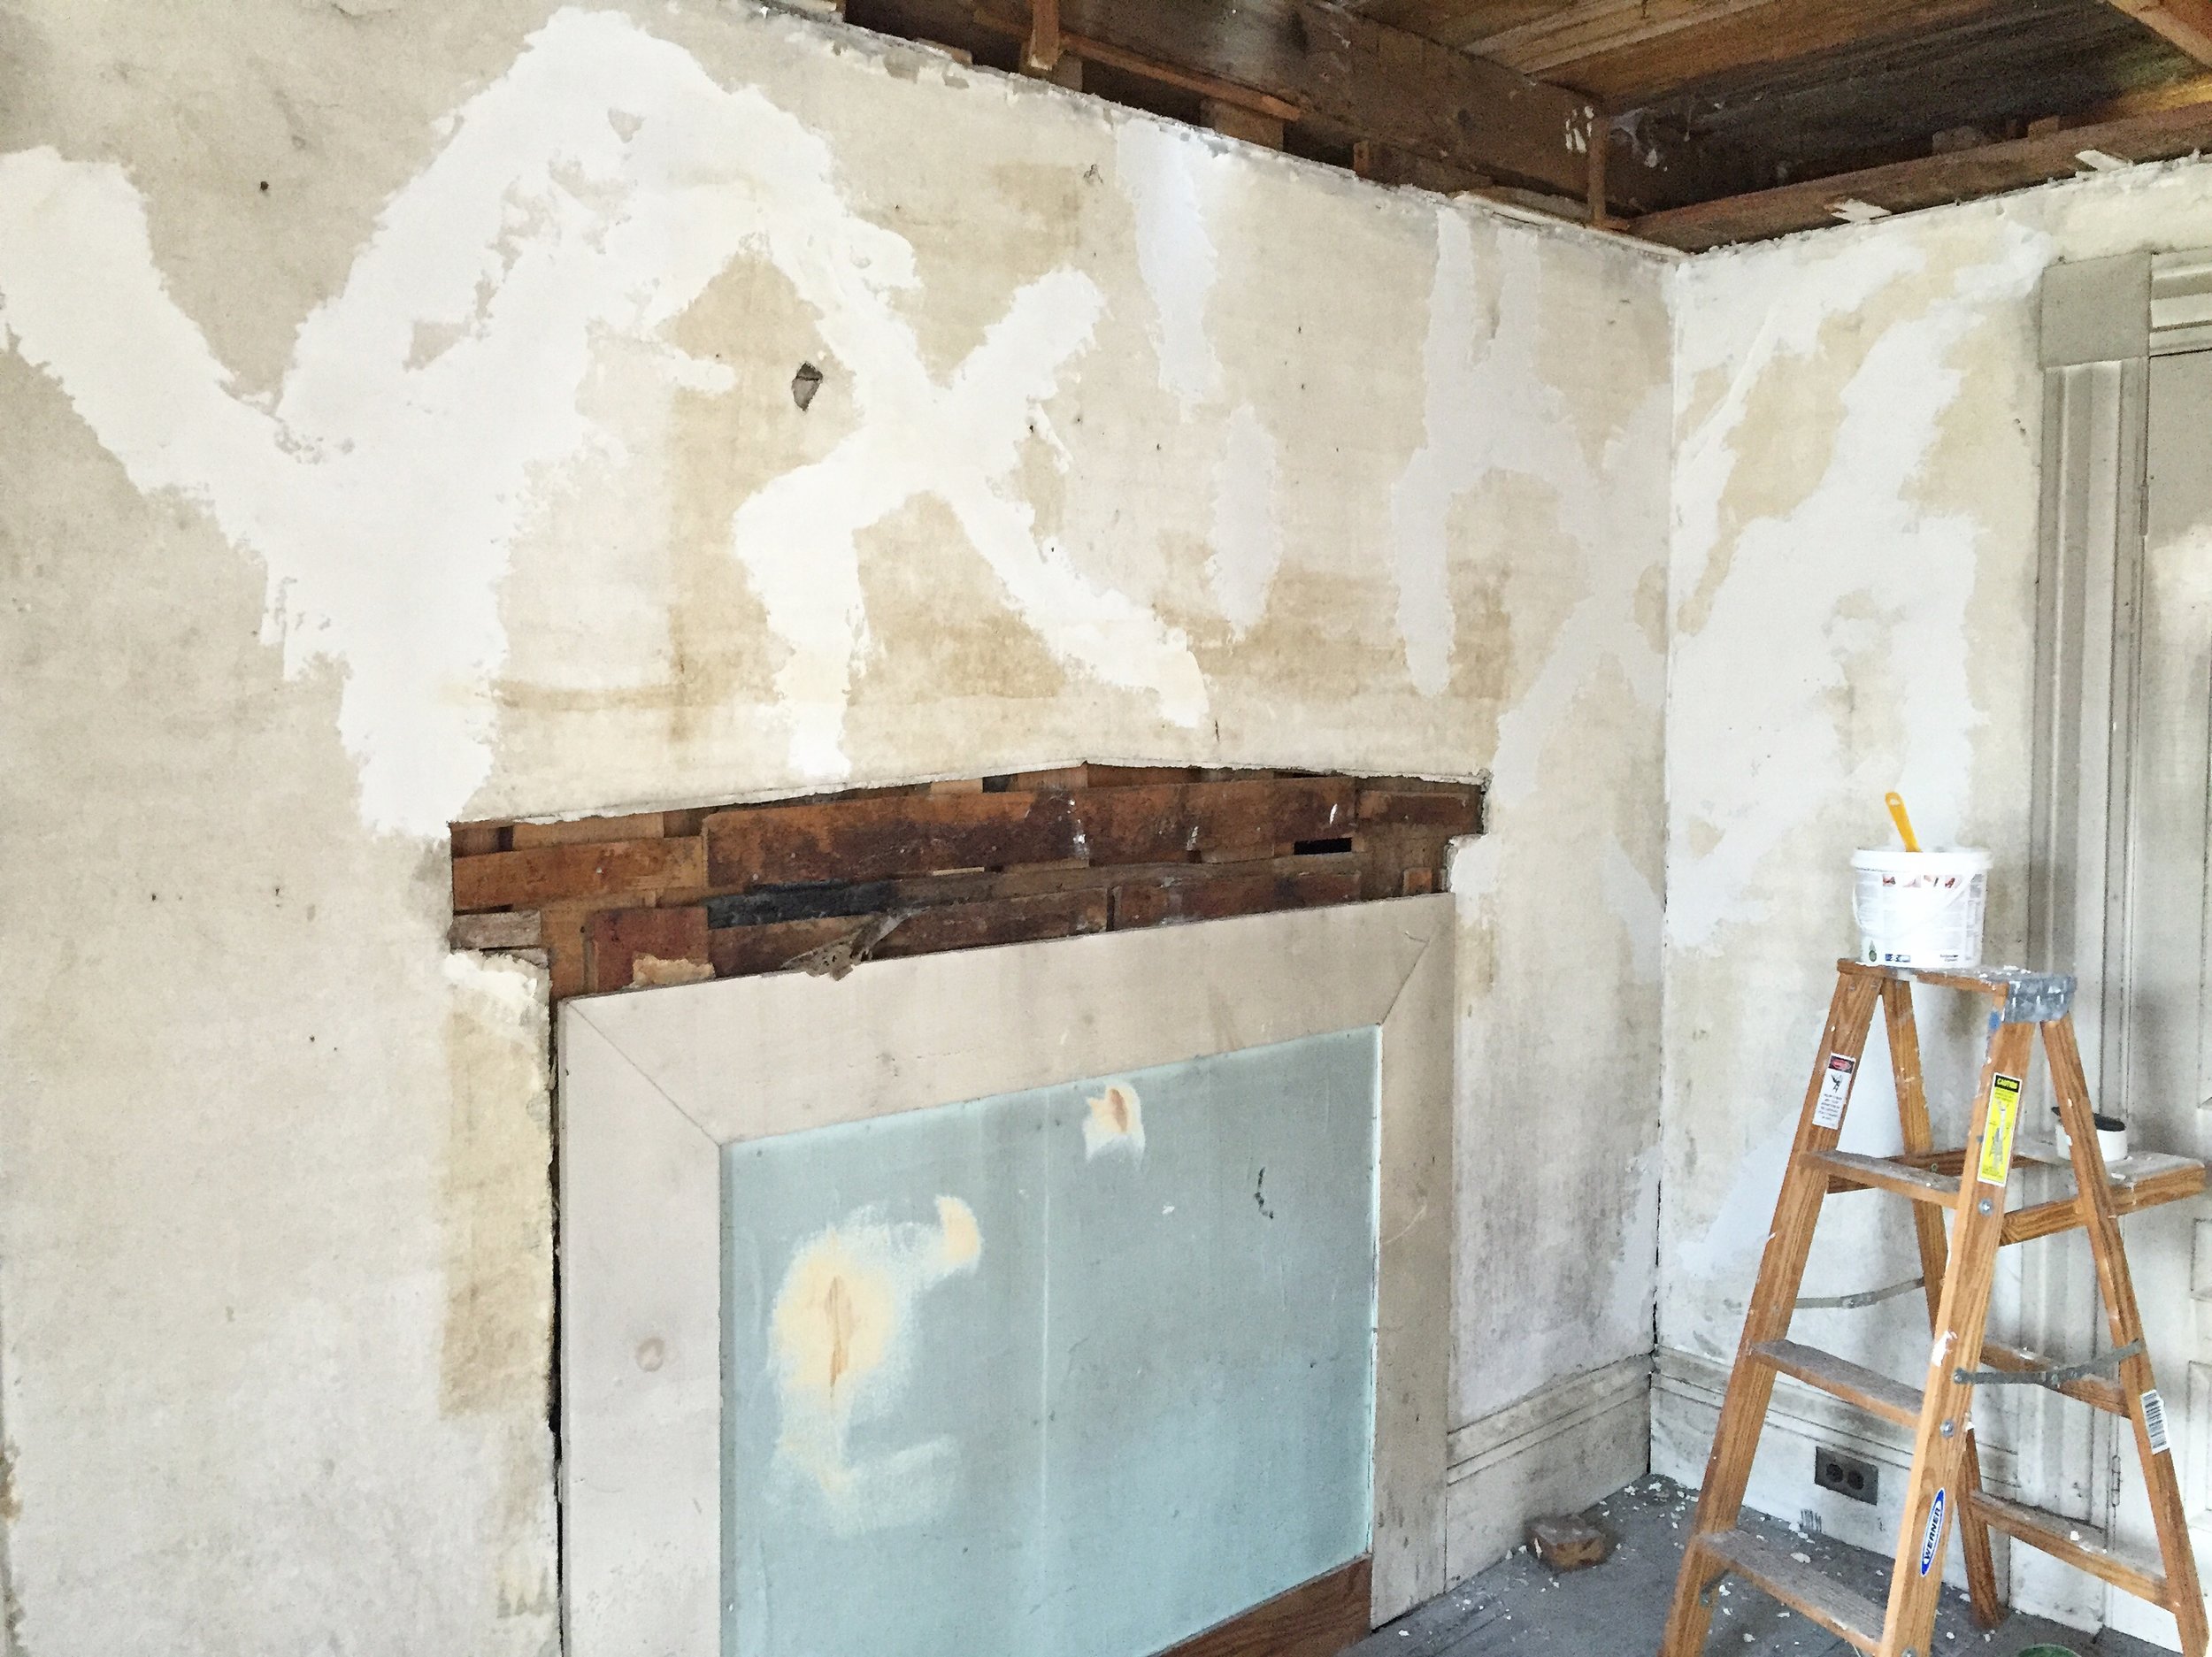
Once we had the cabinets out, we realized the plaster was pretty nasty. So we thought, what the heck, let's just take that down too. And now it looks like this! With the bonus of a free refrigerator we found on the side of the road that just so happens to be the perfect petite size we were going to purchase.

You would think getting to the house this point would be encouraging, but seeing the whole back half essentially gutted has been giving me extreme anxiety. There is so much to do before we can start to build it back up... but it will happen.

Here's what's next: - Replace the single door to sliding patio doors - Move the window over a bit so it will be centered over the new sink - Evaluate the electric, add in outlets where necessary - Put in supports for open shelving - Insulate walls that are currently open - Put up drywall - Address the ceilings, make them match across the two spaces - Think about flooring - Get the space ready for cabinet install

.... I'm tired just thinking about it. We'll be up this weekend tackling small and fun projects, like painting the bathroom something like this moody shade, Benjamin Moore Washington Blue.

Stay tuned for more!

To Do Lists

We officially received our home equity line of credit! This is a huge relief for us, especially after the process turned out to be so long and stressful. Having a line of credit allows us to quickly get lots of big projects finished - rather than saving for one, spending all our cash, and then saving up for the next. Now that we know we have access to enough funds we've started our to do lists for the summer with the goal of being able to sleep in the house by August. So, what is there to do?  We separated the lists out by room to make it seem a little more digestible. The kitchen/dining room is our biggest problem child, like I discussed a couple months ago. This is the plan:

First, replace the current cabinets. Although I LOVE the way these cabinets look, and am attached to them because they were made by my family, they just don't work for the space anymore and they've gotten pretty wonky from the lack of temperature control in the house. We are going to reconfigure the lay out to accommodate a refrigerator and put in a new/old cast iron sink we rescued from Craigslist ($60 steal!). We won't be replacing the upper cabinets and are going for open shelving instead. We are SO excited that Block Brothers Custom Cabinets is going to do this for us. We met Ben through a friend of a friend, and he has now become a friend of ours. We're so psyched to work with him on this project because he seems just as nostalgic as us, totally understands our vision, and is extremely talented - perfect combo.

Untitled

Then we gotta buy some appliances -- a little fridge and an oven, put down some flooring (leaning towards wood floors painted forest green or navy like this), add a back splash (I won the battle on this one, he wanted subway tiles but we're going with penny rounds like this but probably white), put in some lighting, change the single door to french patio doors or a slider to really bring in natural light, and replace the ceiling that was taken down in the dining room (we'll match it to the kitchen ceiling). No sweat.... right? Oh and I forgot to mention tearing out more plaster in the dining room (it's moldy beyond fixing) and replace the walls with sheet rock. Ok, that's it there.

IMG_7002

The other rooms, like the bedroom, have smaller to do lists. We need to put up a new ceiling, fix the plaster and either paint or wallpaper, refinish the floors, and think about putting in either an antique or custom mantle where the old one was removed.

IMG_7033

The bathroom just needs a face lift, like I previously mentioned. A coat of paint, a shower curtain, a bathmat, some wallpaper and maybe a couple shelves and we're good to go.

The living room doesn't need much work either, just refinishing the floors and a coat of paint.... but we can't do that until it's cleared out. That will probably happen once the bedroom and kitchen are closer to being finished (hopefully?) or perhaps we'll stash stuff back upstairs at some point -- we're leaving upstairs for next year.

Untitled.jpg

The exterior needs some love too -- we need to replace the bulk head doors right away because they've rotted out. The foundation needs some attention too -- there are some holes that need patching. We're hoping to add a deck to the back of the house as well. Once we put the larger doors in the kitchen it'll be the perfect landing spot to look into the backyard and do a little barbecuing.

IMG_7521

IMG_7520

In the pictures above you can see the backside of the house. The deck will probably run most of the length of the house with a step tapering to the ground, something like this one below via the Norton Road blog.

IMG_3449.JPG

On top of these cosmetic and construction to dos, the other huge piece is updating the heating system and thinking about insulation. The insulation part might wait until next year, but hot water is a must during the summer, especially if we want to stay there, even if we're not heating the house. We're meeting with a plumber on Monday to discuss our options.

Part of the reason we're so gung ho about getting a lot done this year is we're starting to think about actually making the move and living here. In the past when people have asked if we'll move in when it's done we've always said, "No, I don't think so. It's really remote," but in the past month or so we've starting thinking more about it. We've been in the city for almost eleven years, and we're over it to say the least. We're ready for a more simple way of life, and a vegetable garden. It's a big and scary step, but there is so much to look forward to with the idea of living rent-free. We'll be thinking a lot more about it over the next several months, and probably for the next year, but it's starting to seem more like a reality every minute.

I'll be in Maine this coming Saturday and staying for about a week, and I can't wait to fill you in on our to do list progress!


The Kitchen Project

The biggest undertaking at the house is no doubt the kitchen. As in most homes, this space was really the heart of the home. My great-grandmother, Myrtle "Marm" Day, used to host family baked bean supper every Saturday night and according to lore, you had to have a very solid excuse to miss it. She was a master cook famous for her donuts and perfectionism. My mom once told me she saw her fling a pie like a frisbee out the back door because it didn't taste right. You enter the house from this infamous back door directly into the kitchen and the dining room was located through a doorway to the left. One of the first things we did at the house was remove this wall to create one big cooking and dining space rather than keep the two cramped spaces separate. It's a miracle they fit so many people in there for supper every week, and we're looking forward to accommodating a big group again, but this time maybe a bit more comfortably.

We took the wall down on a bit of whim when my sister and I walked through the house with my dad telling him our plans, which resulted in us demo-ing this wall in flop flops. My dad was not fazed, because he is a tried and true Mainer and tough as nails, but I do not recommend! We made some fun discoveries when taking down this wall including amazing retro wallpaper behind paneling and a tin patch in the plaster that included an old motor oil can.

We had been using the dining room as a storage space from when we cleaned out the attic. All the furniture that we thought we'd use at some point was stored in here, but we moved it once again into the living room so we could begin work on the dining room ceiling. This side of the house had a big moisture problem which resulted in heavily damaged plaster ceilings and moldy walls.


We continued to make this space as cleaned up and stripped down as possible by taking up the linoleum tiles that covered the floors in both the kitchen and dining room - and strangely, the kitchen countertop. My husband did this using a machete which is definitely unconventional, but absolutely effective.

The image to the top right shows the current kitchen set up, and this is directly to your right as you enter through that back door. While I absolutely adore these handmade cabinets, we're going to remove them and put them in the basement to use for storage. This current configuration doesn't really include enough space for a fridge, and they are too wonky in their current state.

Now that you've see what we have to work with I can't to show you what we have planned to make this space donut-making ready! If you're following along on my Instagram, every kitchen post is hashtagged #brooklinheirloomkitchen so you can easily get a glimpse at the past and the progress.